
Yes, you should always wash walls before painting. Start with warm water and a few drops of mild dish soap, wipe each section clean, rinse thoroughly with plain water, and let the surface air-dry completely before you open a paint can. Skip straight to a degreaser or diluted bleach only if you’re dealing with kitchen grease or mold.
TL;DR:
- Walls should be thoroughly cleaned with mild soap and water, especially in areas with grease or mold, to ensure proper paint adhesion.
- Rinsing with clean water is essential after washing, as leftover residue can prevent paint from bonding and cause peeling or bubbling later.
- Drying time varies based on humidity and ventilation, so check for dryness by pressing with your hand or using a cloth before painting.
- Fixing common issues like grease stains, mold, or peeling paint requires specific treatments such as degreasers, mold remover, or scraping and sanding.
- Large or complex problems, especially extensive mold or textured finishes, often require professional painting services to ensure quality and safety.
Table of Contents
- Why Cleaning Matters Before You Paint
- Which Cleaner Should You Use?
- How Do You Wash Walls the Right Way?
- How Long Should Walls Dry Before Painting?
- Fixing Common Wall Problems Before You Paint
- When Is It Worth Hiring a Painting Pro Instead?
- Where to Learn More About Wall Prep
- Sources
Why Cleaning Matters Before You Paint
Dust, grease, fingerprints, and pet residue sit on your walls like an invisible layer of wax. Paint can’t grip through that layer, and washing walls before painting is essential to ensure proper paint adhesion, since these contaminants act as physical barriers that lead to peeling, bubbling, or uneven finishes once the paint dries.
There’s a real difference between wiping down a wall for tidiness and cleaning one for paint prep. Maintenance cleaning targets visible marks. Paint-prep cleaning covers every inch of the surface, including corners, baseboards, and the areas behind light switches and vents, because hidden dust and sanding residue will interfere with adhesion just as much as a visible smudge.
Skipping this step tends to show up weeks later, not on day one. Here’s what typically goes wrong when walls get painted dirty:
- Streaking where grease or residue repels the paint unevenly
- Bubbling as paint fails to bond to a dusty or greasy patch
- Peeling within months, especially in kitchens and bathrooms
- A dull, blotchy finish where light reflects differently off contaminated spots
Which Cleaner Should You Use?
Match the cleaner to the mess. Going in with the strongest chemical you own is rarely the right first move, and it can damage the very surface you’re trying to prep.
Plain warm water handles light dust and everyday grime just fine. For most walls, though, the best general cleaning solution is warm water with a few drops of mild dish soap, which lifts fingerprints and household dust without leaving anything harsh behind. Save stronger options for the walls that actually need them:
- Water only: dust, light cobwebs, minor scuffs
- Water + mild dish soap: general grime, fingerprints, everyday buildup
- TSP substitute or degreaser: kitchen grease, stovetop splatter, garage walls
- Diluted bleach (a mild solution recommended for mold) in a well-ventilated room: visible mold or mildew, only in a well-ventilated room
TSP substitutes are widely recommended for degreasing surfaces before painting, but read the label and rinse thoroughly afterward since residue left behind can interfere with adhesion just as much as the grease did.
Bleach solutions need real ventilation, rubber gloves, and never mix with ammonia-based cleaners. Test any cleaner, especially bleach or a degreaser, on a small hidden section first. Some painted finishes react differently than you’d expect, and you don’t want a surprise on your main wall.
Pro Tip: Always start with the gentlest effective method, such as water and a soft sponge, and escalating too fast to scrubbing pads or harsh chemicals can burnish or dull the paint underneath, especially on flat and matte finishes.
How Do You Wash Walls the Right Way?
A clean, methodical process beats a rushed one every time, and it doesn’t take specialized equipment. Here’s what to gather before you start:
- Drop cloths for the floor and any furniture nearby
- A vacuum with a brush attachment, plus a microfiber duster
- Two buckets, one for wash water and one for rinse water
- Non-abrasive sponges (no scouring pads)
- A sturdy ladder for ceilings and upper walls
- Rubber gloves, and a mask if you’re using bleach or a degreaser
Step 1: Prep the room. Remove outlet covers, tape off trim and window frames, and lay drop cloths along the baseboards.
Step 2: Dust everything first. Vacuum corners, ceiling lines, and vents, then go over the whole wall with a microfiber duster. Washing over dust just turns it into mud you’ll smear around.
Step 3: Work in sections. Divide the wall into arm’s length areas so you’re never leaving soapy water sitting on drywall for too long.
Step 4: Wash with light pressure. Use vertical or circular strokes with a damp, not soaked, sponge. Painted drywall should never be soaked; a damp sponge and light pressure clean just as well without risking soft spots or bubbling paper.
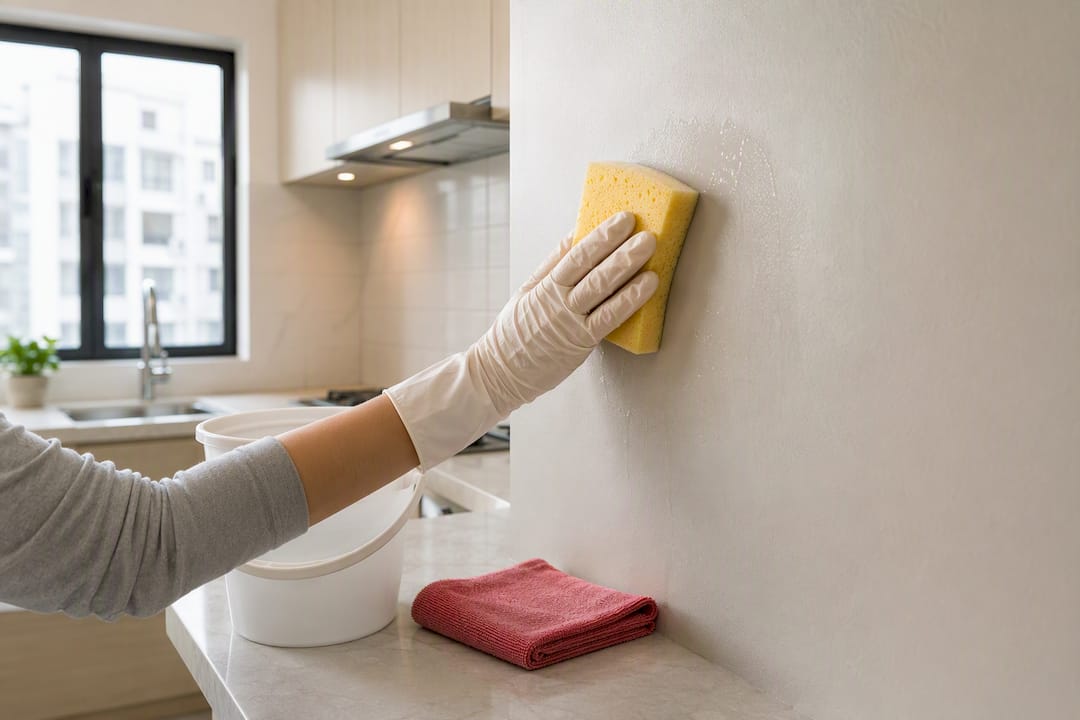
Step 5: Rinse each section immediately. Switch to your second bucket of clean water and wipe the same area before moving on.
Step 6: Do a final wipe-down. Run a dry microfiber cloth over the wall to catch any last residue and confirm nothing feels tacky or filmy.
Rinsing isn’t optional. Failing to rinse cleaning solutions can leave a microscopic film that keeps primer and paint from bonding properly, which means all the work you just did could still end in a peeling wall. For a deeper walkthrough of technique by wall type, see 5starpainting’s guide on cleaning painted walls.
How Long Should Walls Dry Before Painting?
There’s no fixed number of hours that works for every home. Humidity, room ventilation, and how much water you used all change the timeline, and walls should air-dry completely, often taking several hours or more depending on humidity and ventilation, before you touch them with primer or paint.
Confirm dryness instead of guessing. A few checks catch what your eyes might miss:
- Press the back of your hand flat against the wall; any coolness typically indicates lingering moisture.
- Blot a spot with a clean white cloth. If it comes away damp, wait longer.
- Check low corners and behind furniture, where airflow is weakest and drying takes longest.
Once the wall passes those checks, decide between priming and painting directly. Bare patches, stains, or color changes call for primer first. A clean, sound existing coat in similar color often goes straight to a fresh coat. For a fuller prep timeline, 5starpainting’s interior painting checklist walks through the whole sequence from cleaning to final coat.
Fixing Common Wall Problems Before You Paint
Most walls have at least one trouble spot, and each one has a specific fix rather than a one-size answer.
Grease stains need a degreaser or TSP substitute, applied with a non-abrasive scrubber and rinsed twice rather than once. If a shadow of the stain still shows through after drying, spot-prime that section before painting over it.
Crayon and marker marks usually respond to a mild solvent-based cleaner or light sanding. Follow either method with a small dab of primer so the mark doesn’t bleed through your topcoat.
Peeling paint isn’t a washing problem. Scrape the loose paint, sand the edges smooth, fill any gaps with spackle, then prime before repainting.
Mold and mildew call for a diluted bleach wash, a full rinse, and thorough drying. If mold returns after treatment, the root cause is usually a moisture problem like poor ventilation or a slow plumbing leak, and that needs fixing before any paint goes back on.
Pro Tip: If mold covers more than a small patch, or keeps reappearing after cleaning, call a professional. Extensive contamination is a health and structural issue, not a weekend project. If interior doors near a damp wall need attention too, this guide to cleaning interior doors covers gentle methods that won’t strip existing finishes.
When Is It Worth Hiring a Painting Pro Instead?
Most walls are a fair DIY job with an afternoon and the right supplies. Some situations tip the scale toward calling in help. Large-scale peeling across multiple rooms, textured paint that needs careful removal, mold that keeps spreading, or a resale timeline with no room for delays are all good reasons to bring in a professional crew instead of troubleshooting alone.
A professional painting service can offer experienced prepping and painting of HDB flats, condos, and landed homes, with dedicated management overseeing surface prep, cleanup, and the final coat. Jobs may use high-quality paint under all-inclusive pricing without separate quotes for prep work versus paint. If your walls need textured paint assessed before removal, this guide on smoothing textured walls explains when a water test alone works and when it doesn’t.
A professional prep service typically includes wall washing, patching, sanding, and a full furniture and floor protection setup, followed by a cleanup pass once the paint’s dry. Some professional painting services back their work with a one-year warranty, which is worth factoring in if you’re weighing the time savings of DIY against the certainty of professional work. If you’d rather hand off the whole project, get a quote for professional painting services and skip the ladder entirely.
Where to Learn More About Wall Prep
For deeper guidance beyond this article, these sources cover the specifics of cleaning solutions, rinsing, and technique in more depth:
- Martha Stewart’s wall-cleaning guide for adhesion basics and drying guidance
- Dutch Boy’s cleaning how-to for cleaner selection and TSP substitute use
- Bob Vila’s painted wall guide for rinsing technique and mold root causes
- Sherwin-Williams’ cleaning guide for matching cleaning method to paint sheen
Sources
- How to Clean Walls Before Painting | Martha Stewart
- How to Clean Walls Before Painting | Dutch Boy
- How to Clean Painted Walls | BobVila
- How to clean walls | Sherwin-Williams
2 Responses