
Skim-coating is the reliable fix for painted textured walls, since paint seals the surface and blocks water from softening the compound underneath. Soak-and-scrape only works on texture that was never painted. Run the water test first: it tells you which method you’re actually dealing with before you touch a scraper or a trowel.
TL;DR:
- Skim-coating is recommended for painted textured walls since water-based removal methods tend to damage drywall or gouge the surface.
- Conduct a water test to determine if the texture is painted or unpainted, with softening indicating unpainted texture suitable for soak-and-scrape.
- For painted textured walls, skim-coating involves multiple coats of thinned joint compound, thorough sanding, priming, and careful surface preparation.
- If more than half the wall is textured or uneven, skim-coating provides a smoother, more durable finish than spot patching or partial removal.
- Large or complex surfaces, old plaster, or homes built before the 1980s often require professional help to ensure safety and a high-quality result.
Table of Contents
- Quick Decision Guide: Choose the Right Method for Your Wall
- When to Skim-Coat vs Remove Texture
- Step-by-Step: Skim-Coating Painted Textured Walls
- Step-by-Step: Wet Soak-and-Scrape for Unpainted Texture
- Sanding, Repairing, and Preparing the Smoothed Wall
- Priming and Painting After Smoothing
- Time, Cost, and Effort: DIY vs Hiring a Pro
- Safety, Dust Control, and Special Cases
- A Contractor’s Perspective: Why Pros Often Choose Skim-Coating
- Getting a Professional Estimate for Wall Smoothing and Painting
- Sources
Quick Decision Guide: Choose the Right Method for Your Wall
Before you buy a single tool, spray a small, inconspicuous patch of texture with warm water and wait a few minutes. If the texture darkens, softens, and releases under light pressure, you have unpainted texture and soak-and-scrape will work. If water beads up or the texture stays hard, it’s painted, and skim-coating is your path forward.
A few other signals help confirm what you’re working with:
- Knock test: a dull, dense thud usually means plaster; a hollow sound points to drywall.
- Powdery residue on your hand after wiping the wall suggests chalking paint, which needs cleaning and a bonding primer before anything else.
- Glossy or slick texture almost always means it’s painted, even if the water test result is borderline.
- Painting directly over texture is only acceptable when the surface is sound, clean, and free of chalking or adhesion problems. If in doubt, treat it as painted and skim-coat.
When to Skim-Coat vs Remove Texture
The general rule: if imperfections or texture cover more than roughly half the wall, skim-coating is the correct approach, not spot-filling. Spot-filling works fine for a few dings or a small patch of orange peel, but trying to feather-patch an entire wall of stipple texture usually leaves visible high and low spots once light hits it.
Painted texture tips the decision further toward skim-coating, since the paint layer repels water and prevents the joint compound underneath from softening. Scraping painted texture tends to gouge the drywall paper instead of lifting the compound cleanly.
Scale matters too. A single bedroom is a reasonable weekend project. A whole condo, vaulted ceilings, or a home built before the 1980s where you suspect old plaster, asbestos, or lead paint are all situations where hiring a professional is the smarter call.
Step-by-Step: Skim-Coating Painted Textured Walls
Skim-coating covers painted texture with a thin, even layer of joint compound, then sands it flat. Here’s the full workflow:
- Prep the room. Remove switch plates and outlet covers, mask trim with painter’s tape, and lay drop cloths over floors and furniture. Crack a window or run a fan for ventilation.
- Check for chalking or gloss. If the existing paint is powdery or chalky, clean it thoroughly and apply a bonding primer before skim-coating, or the compound won’t adhere.
- Mix your compound. Thin all-purpose joint compound with water until it rolls easily off a paint tray, similar to thick pancake batter.
- Apply the first coat. Roll it on with a thick-nap roller, then smooth it out with a 12-inch taping knife or a “magic trowel.” Work in manageable sections so the compound doesn’t skin over before you flatten it.
- Let it dry. Give it several hours depending on humidity, then sand with 120 grit to knock down ridges.
- Apply a second coat, thinner than the first, to fill any remaining low spots.
- Final sand with 220 grit for a smooth, paint-ready surface, then prime.
Pro Tip: If a scraper or utility knife nicks through the paint into the drywall’s paper face anywhere during prep, seal that spot with a shellac-based primer before skim-coating. Compound applied over exposed paper without sealing it first is a common cause of bubbling later.
Drying time and grit sequence aren’t optional details. Standard drywall finishing guidance calls for several hours between coats and a 120-to-220 grit progression for a Level 4 finish, which is the standard most homes need before paint.
Step-by-Step: Wet Soak-and-Scrape for Unpainted Texture
If your water test showed the texture softening and releasing, you’re dealing with unpainted texture, and wet scraping is faster than skim-coating.
- Fill a pump sprayer with warm water. Cold water works but takes longer to penetrate.
- Work in 4×4 foot sections. Spraying the whole wall at once lets the first sections dry out before you get to them.
- Wait 3 to 5 minutes after spraying, long enough for the water to soak into the compound and loosen it.
- Scrape at a low angle with a 6 to 12 inch taping knife, letting the blade glide under the softened texture rather than digging in.
- Re-wet stubborn spots and give them another few minutes if the texture doesn’t lift cleanly the first time.
If a section resists after two soak attempts, stop scraping it. Continued scraping at that point tends to tear the paper face of the drywall rather than remove more texture, and torn paper is far more work to fix than a skim coat would have been. Switch that section to skim-coating instead. Any spot where the paper does get exposed or fuzzy needs a shellac-based primer before you patch it, since raw paper absorbs moisture from fresh compound unevenly and causes bubbling.
Sanding, Repairing, and Preparing the Smoothed Wall
Once texture is gone or skim-coated, the wall still needs proper leveling before paint will look right.
- Start with 120 grit to knock down ridges, roller stipple, and trowel marks.
- Finish with 180 to 220 grit for a uniformly smooth surface that won’t telegraph through sheen paint.
- Fill gouges deeper than about a shallow depth with a setting-type compound first to avoid shrinkage, then skim over that patch with all-purpose compound.
- Use mesh tape over large repaired areas or seams so cracks don’t reopen once the wall flexes slightly.
- Vacuum and damp-wipe the entire wall, then let it dry completely before priming. Dust left behind shows up as a gritty texture under paint.
Priming and Painting After Smoothing
Primer choice matters more than most DIYers expect after all that sanding work.
- Use a shellac-based primer anywhere drywall paper got exposed or fuzzy during scraping, and over any chalky residue that wasn’t fully cleaned off.
- Use a standard bonding primer on the rest of the skim-coated surface to even out porosity between old paint and new compound.
- Choose a 3/8 inch nap roller for smooth walls; anything thicker leaves stipple you just spent days removing.
- Confirm the skim compound has fully cured, not just surface dry, before priming. Compound that’s still damp underneath will trap moisture and cause peeling later.
Skipping proper sanding and priming steps measurably increases the risk of paint failure down the line, which means redoing work you already finished once.
Time, Cost, and Effort: DIY vs Hiring a Pro
Expect a few days for an average small room, factoring in drying time between coats, not just active work hours. Materials for a single room, joint compound, primer, sandpaper, and basic tools, typically run under $100. Hiring a contractor costs more, but you’re paying for dust containment, faster turnaround, and a warranty on the finish. For larger jobs, awkward ceiling access, or anywhere you’re unsure about the substrate, that added cost usually pays for itself in avoided mistakes.
Safety, Dust Control, and Special Cases
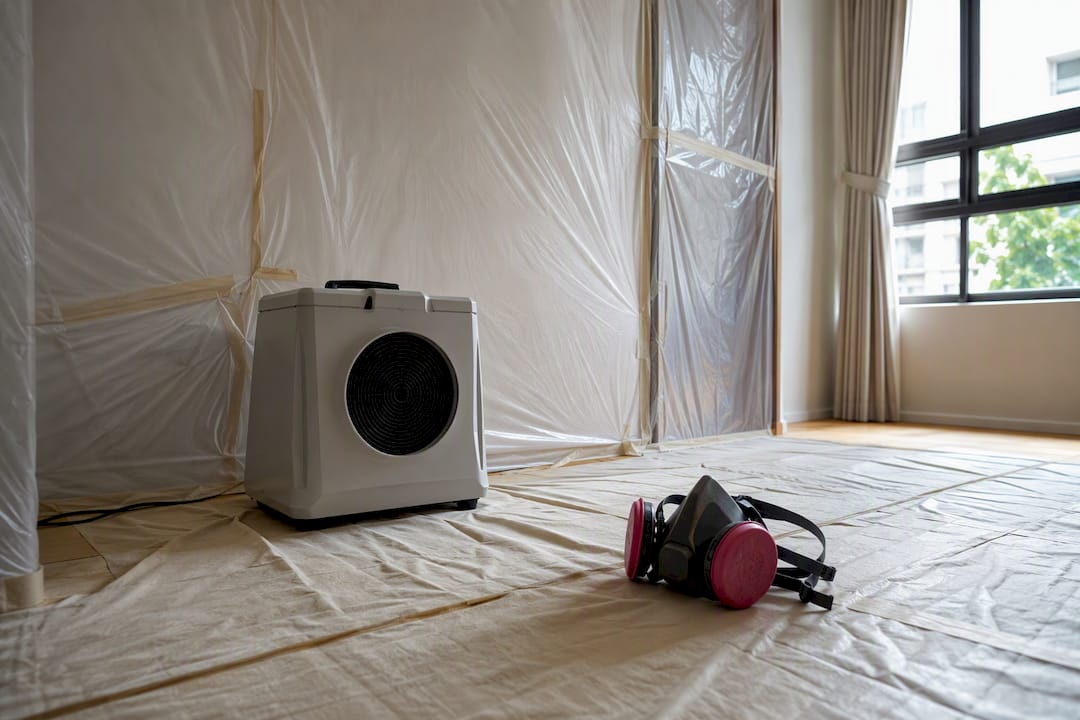
Don’t sand textured coatings of unknown age without testing first. Homes built before the 1980s may have asbestos or lead in old texture or paint, and sanding disturbs particles you can’t see. Seal off the work area with plastic sheeting, and run an air scrubber if you have access to one; a basic N95 respirator is the minimum for any sanding session. Random-orbit sanders are too aggressive for finish work and belong only to heavy initial removal. If you’re working on old plaster or a wall that’s still wet from scraping, stop and bring in a specialist rather than pushing power tools into a surface you don’t fully understand yet.
A Contractor’s Perspective: Why Pros Often Choose Skim-Coating
Skim-coating trades a bit more time for a lot less risk. Scraping feels faster in the moment, but it’s the method most likely to leave you staring at torn drywall paper and an unplanned repair bill. Professionals lean toward skim-coating because a flatter, more predictable finish is worth the extra 24 hours of drying time between coats.
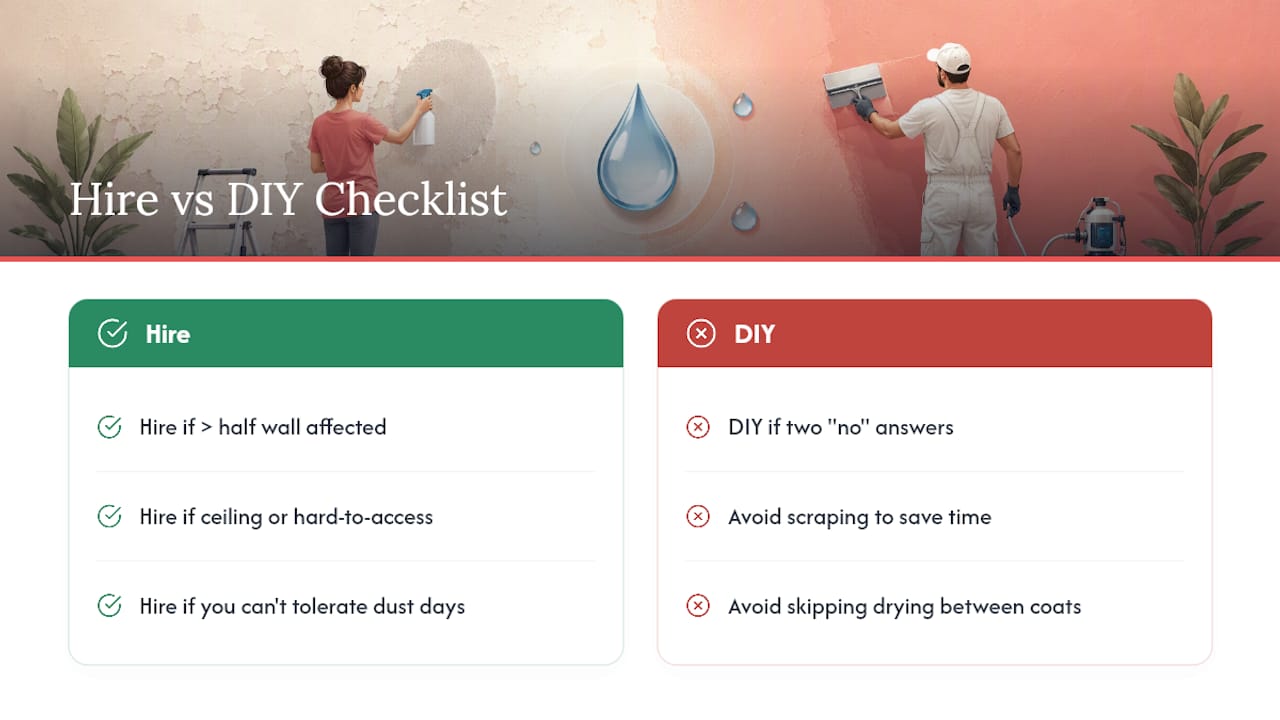
What a contractor brings that’s hard to replicate solo is dustless sanding equipment, a project timeline that accounts for cure times instead of guessing, and a warranty if the finish fails. If you’re weighing DIY against hiring out, ask yourself three questions: is more than half the wall affected, is the ceiling or a hard-to-access area involved, and can you tolerate a few days of dust containment in your own home. Two “no” answers usually mean DIY is fine. Two “yes” answers usually mean it’s worth a quote.
— Fabian
Getting a Professional Estimate for Wall Smoothing and Painting
If the water test, the sanding, and the multi-day drying windows sound like more than you want to take on, a full-service painting contractor handles the entire sequence: surface prep, skim-coating, dust containment, priming, final coats, and cleanup, backed by a warranty on the finished work. 5starpainting manages that process end to end for HDB flats, condos, and landed homes, with a personal project manager assigned to each job and all-inclusive pricing that covers labor, genuine Nippon Paint, furniture protection, and cleanup.

Getting a quote is straightforward: share your room dimensions, a few photos of the current texture, and any access notes (tight stairwells, high ceilings, furniture that can’t move). For flats specifically, the HDB painting service starts at $600 all-inclusive, and condo owners can check the condo painting service starting at several hundred dollars. Request a walkthrough and get a firm number before deciding whether to pick up a trowel yourself.
Sources
For deeper technique detail, see dustless sanding methods and fixing uneven paint coverage. Always check product labels, and consult a local specialist for older homes.
- Removing Wall Texture: Scraping and Skim Coating Methods Compared — Build-Construct
- Chalking | Dunn-Edwards
- How to Prepare Walls for Painting — Kompozit (2026)
- How to remove textured walls — Constructli
2 Responses