
The most reliable way to get dustless sanding walls involves pairing net-style abrasives, like Mirka Abranet, with a dedicated dust extractor rated HEPA or M-class, connected through correctly matched hose and hardware. This combination pulls dust through the abrasive itself instead of letting it settle on your floors and furniture.
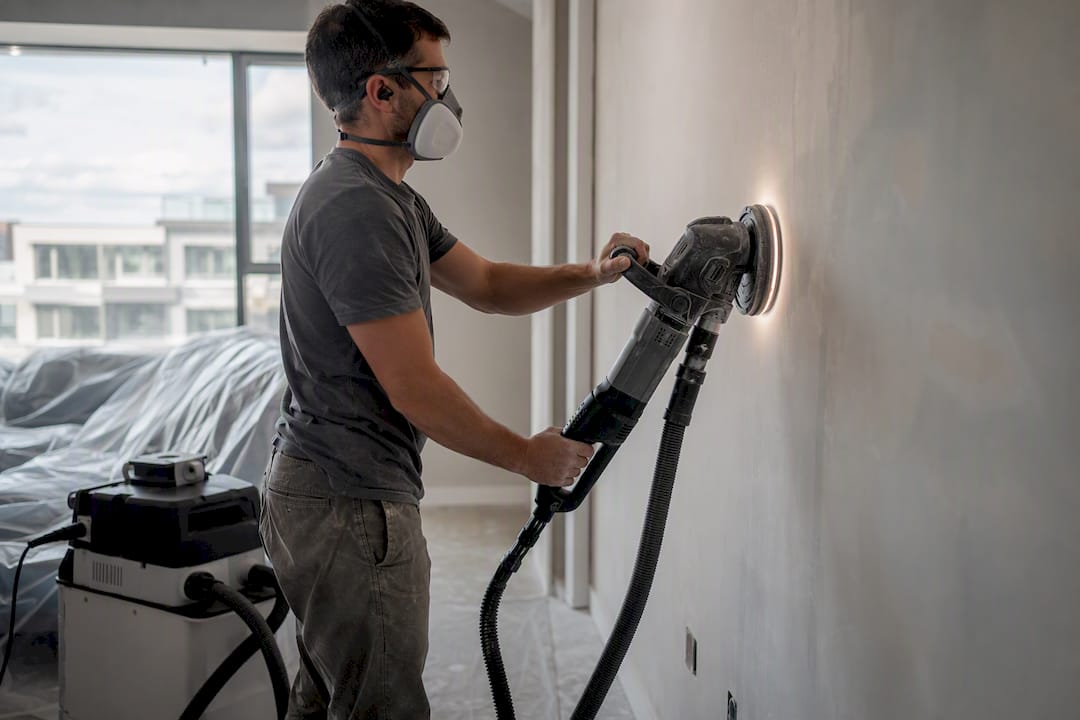
Before you pick up a sander, take care of three things. Put on a properly fitted respirator, safety glasses, and old clothes you don’t mind chalking up. Set up your extractor and run a test connection to confirm suction before you touch the wall. If you don’t have net abrasives yet, a pole sander with a vacuum attachment is a solid fallback.
This setup matters because airborne drywall dust is genuinely hard to control once it escapes, and it clogs cheap sandpaper fast, slowing you down and wasting material. Get the extraction right first, and everything after that gets easier.
- Wear a respirator rated for fine particulate, not a basic paper mask
- Test your extractor’s suction before starting the wall
- Use net-style discs where you have the option
- Keep a spare hose adapter on hand in case of a bore mismatch
Key Takeaways
Dust-minimizing sanding depends on pairing net abrasives with a properly rated, well-maintained extractor, matched hose bore, and the correct grit progression for the job.
| Point | Details |
|---|---|
| Choose net abrasives first | Net-style discs like Abranet resist clogging and route dust straight into the vacuum. |
| Match filtration to the job | HEPA or M-class extractors with auto-start keep suction consistent through a full room. |
| Match hose and port size exactly | A one-size mismatch can cut effective airflow dramatically, even with a strong vacuum. |
| Adjust speed and suction for finish passes | Lower speed and suction on the final grit pass reduces chatter and improves smoothness. |
| Hire 5starpainting for full-room jobs | 5starpainting handles prep, dust control, cleanup, and a one-year warranty under one fixed price. |
Table of Contents
- Why Dustless Sanding Methods Actually Matter
- The Methods That Actually Cut Down Dust
- What to Look for in Extraction Equipment
- Step-by-Step: A Dustless Sanding Workflow for a Room
- Fixing Common Dustless Sanding Problems
- When to Call a Painting Professional Instead
- Where the Real Trade-Off Sits
- Get a Low-Dust Finish Without Buying the Equipment
- Sources
Why Dustless Sanding Methods Actually Matter
Fine drywall and paint dust doesn’t behave like sawdust. Particles from sanded joint compound are small enough to stay airborne for hours and settle into HVAC returns, closets, and lungs long after you’ve put the sander down. That’s the real argument for high-efficiency filtration, not just tidiness.
There’s also a finish-quality angle most guides skip. Dust that resettles onto a freshly sanded wall before priming creates tiny nibs and unevenness under the topcoat, which shows up as texture once light hits the wall at an angle. Sanding dust-free the first time avoids a second round of touch-up sanding after primer reveals flaws you missed.
Extraction efficiency isn’t marketing fluff, either. 3M states its complete Xtract system, which pairs a purpose-built sander with net discs and a matched extractor, can capture up to 99% of sanding dust when the components are correctly paired. That number only holds when every part of the chain, sander, disc, hose, and vacuum, is actually working together.
The time savings compound, too:
- Less cleanup after the job, since dust never spreads past the work zone
- Fewer clogged discs, since net abrasives resist loading with debris
- Less repainting caused by dust nibs trapped under primer
- Faster room turnaround for anyone juggling a tight renovation schedule
The Methods That Actually Cut Down Dust
Not every “dustless” method performs the same, and the differences matter more than most people expect.
-
Net abrasives. Discs like Mirka Abranet use a mesh structure with thousands of small holes instead of a solid paper backing. Dust passes straight through the mesh into a connected vacuum rather than clogging the grit, which is why net-based abrasives resist clogging far longer than traditional paper discs. They work well for both joint-compound knockdown and light paint-film sanding before recoating.
-
Powered wall sanders. Random-orbit drywall sanders, purpose-built units with a soft, articulating head, and rotary sanders all remove material, but they don’t leave the same finish. Purpose-built drywall sanders and random-orbit models tend to leave a flatter, swirl-free surface because the head flexes to stay flush against the wall, while rotary tools are more prone to leaving visible swirl marks if you’re not careful with speed and pressure.
-
Pole sanders paired with a vacuum. This is the realistic DIY middle ground. A pole sander lets you reach ceiling joints and upper wall sections without a ladder, and running a hose to a shop vacuum captures a meaningful share of the dust at the source. It’s slower than a powered extractor setup, but it’s far cheaper and works fine for a single room or a patch job.
-
Hand sanding with a vacuum-follow technique. For small repairs, corners, and areas too tight for a pole head, hand sanding with a sanding sponge while a second hose (or a helper) holds a vacuum nozzle an inch or two from the work area catches most of the dust before it spreads. It’s tedious for a full wall, but it’s the right call for touch-ups.
Independent testing backs up the gap between these approaches. Fine Homebuilding’s comparative sander test found that high-end drywall sanders paired with a proper extractor dramatically cut airborne dust, but performance varied a lot by model, and every system still released some dust when the extractor was switched off or the filter bag was full.
Pro Tip: If you’re choosing between a rotary sander and a dedicated drywall sander for finish work, go with the dedicated tool. The articulating head keeps constant contact with the wall, which is the main reason it avoids the gouges and swirl marks rotary sanders tend to leave on flat drywall.
What to Look for in Extraction Equipment
Your abrasive choice only performs as well as the vacuum behind it. Filtration class is the first spec to check. HEPA filtration captures the finest particulate, while M-class extractors, the standard referenced in Rutlands’ M-class drywall sander system, are built for the hazardous dust classification most sanding jobs fall under, and they typically include auto-filter cleaning and auto-start, which sync the vacuum to the tool’s trigger.
Airflow matters just as much as filter rating. A pole sander needs a vacuum with enough practical airflow to actually pull heavy particulate through the hose; an underpowered shop vacuum will choke a dust-free pole sander design no matter how good the abrasive is.
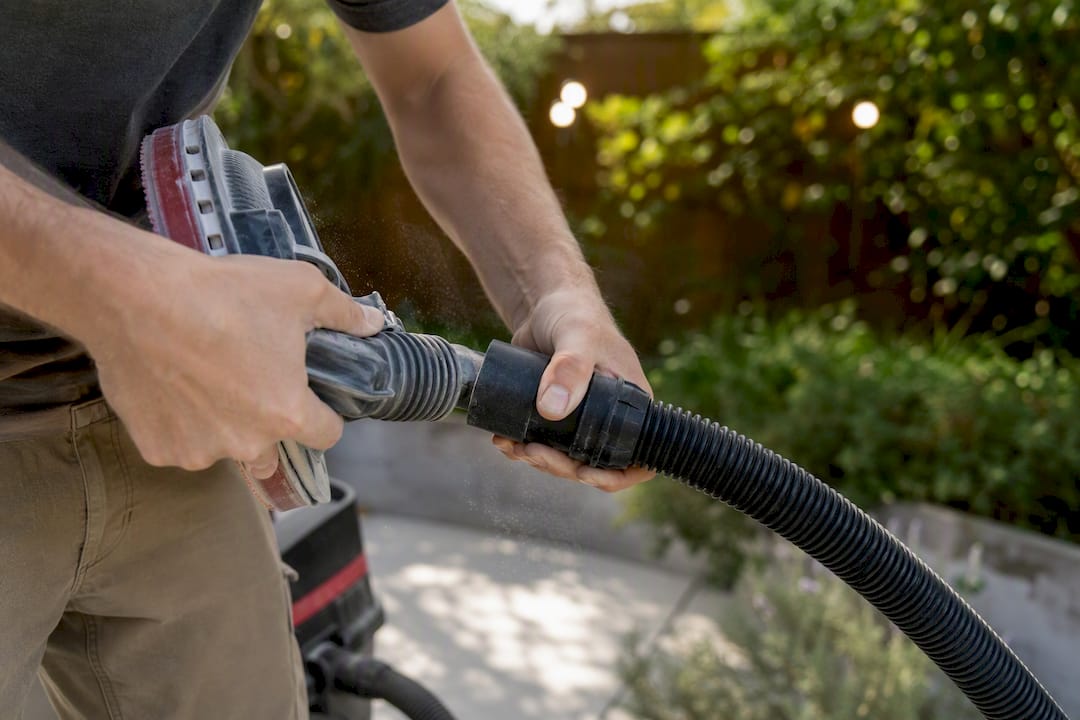
Hose diameter deserves its own line item, because it’s the mistake most DIYers make without realizing it. A mismatch of even one size, say a 38mm tool port forced onto a 32mm hose, cuts effective airflow dramatically, even if the vacuum itself is powerful. Match the port and hose bore exactly, or use a single short adapter rather than stacking fittings.
For abrasive grit, keep it simple:
- 80 to 120 grit for rough removal of ridges, excess compound, or old paint texture
- 120 to 220 grit for feathering edges and final finish sanding before primer
On tool ergonomics, corded units give you steady power for a full-room job, while cordless pole sanders are easier to maneuver around furniture and up ceilings. Weight matters more than most buyers expect. A head that feels fine at the store can wear out your arms fast on a ceiling after twenty minutes of overhead work.
Step-by-Step: A Dustless Sanding Workflow for a Room
Set up the room before you touch a sander. Cover HVAC vents with painter’s plastic, seal doorways to adjacent rooms, and clear or cover furniture. Put on your respirator, eye protection, and a set of clothes you can shake off outside.
- Start with rough removal. Use 80 to 100 grit to knock down ridges, excess joint compound, and heavy texture.
- Move to joint sanding. Switch to 100 to 120 grit and focus on seams and screw heads.
- Feather the edges. Blend compound edges into the surrounding wall with the same grit, using light pressure and wide, overlapping passes.
- Finish sand the whole surface. Step up to 150 to 220 grit for the final smoothing pass across the entire wall.
- Verify and clean. Run a hand over the surface, wipe with a tack cloth, and check for dust nibs under raking light.
While you sand, position the extractor hose so it doesn’t fight your arm movement, usually behind you or looped over a shoulder strap if the unit supports one. Dial suction up for rough removal and down slightly for finish sanding. Lower suction paired with lower sander speed often produces a smoother final pass, since too much vacuum pull can make the sanding head chatter against soft compound.
A few technique notes make a real difference:
- Keep the sanding pad flat against the wall; tilting it digs grooves into soft compound
- Overlap each pass by about a third to avoid uneven ridges
- If you’re hand sanding a patch, hold the vacuum nozzle close to the work, not just nearby
- Check your extractor’s suction indicator periodically. A drop usually means the filter bag needs emptying
Once you’re done, do a wipe test with a clean white cloth across the wall. If it comes away with visible dust, go over the surface again with a tack cloth before moving to primer. A wall that’s genuinely primer-ready should feel smooth under a flat hand, with no grit, ridges, or visible dust film anywhere across the surface.
Fixing Common Dustless Sanding Problems
Even a good setup goes wrong in predictable ways. Here’s what to check first.
Dust escaping despite the extractor. Check every coupling between the sander shroud and the hose. A loose fitting anywhere in that chain will leak dust no matter how strong your vacuum is. Reseat the shroud against the wall and confirm the hose clicks fully into the sander’s port.
Abrasives clogging fast. This usually means you’re using paper discs on wet or fresh compound, or the extractor’s suction has dropped. Switch to net-style abrasives if you haven’t already, and give surfaces at least the manufacturer’s recommended cure time before sanding. Static buildup can also cause dust to stick rather than pull through the mesh. Wiping the wall with a slightly damp cloth beforehand (once fully dry) can reduce that.
Swirl marks on the finish. Usually caused by rotary sanders run too fast or with too much downward pressure. Switch to a random-orbit or dedicated drywall sander and let the head do the work instead of pressing harder.
Dust still settling after everything above. Improve containment first, plastic sheeting sealed at the edges, not just draped, then raise your extractor’s suction setting. If dust is still an issue after that, it’s usually a sign the room needs professional-grade equipment rather than a home setup.
Pro Tip: Keep a spare filter bag on hand for any job larger than a single wall. A saturated filter is the single most common reason a “dustless” setup starts leaking dust midway through a room.
When to Call a Painting Professional Instead
DIY dustless sanding works well for a single wall, a small repair, or a room where you control the schedule. It gets harder to justify once you’re dealing with heavily textured walls, occupants sensitive to dust (young kids, allergies, respiratory conditions), or a tight turnaround before movers or tenants arrive.
That’s the gap 5starpainting is built to close. Every job includes full surface preparation, a dust-control protocol suited to the space, complete cleanup, and a one-year warranty, all managed by a personal project manager assigned to your job from start to finish.
A room that looks dust-free right after sanding can still leave a fine film behind for hours. Professional crews plan containment and cleanup around that reality, not just the sanding step itself.
- Full prep and hole patching before any paint goes on
- Dust-control protocols suited to occupied homes
- Furniture protection and post-job cleanup included
- One-year warranty backing the finished work
Where the Real Trade-Off Sits
Most advice on this topic treats dustless sanding as a single decision: buy the right vacuum, use net abrasives, done. That undersells how much the extractor’s condition, not just its rating, decides the outcome. A HEPA-rated vacuum with a saturated filter performs worse than a mid-range M-class unit that’s been properly maintained. Fine Homebuilding’s testing backs this up: even top-tier systems leaked dust once the extractor cycled off or the filter clogged.
The other place conventional wisdom falls short is grit strategy. Homeowners tend to focus on the abrasive brand and skip the speed and suction adjustments that actually determine finish quality. Dialing back both for the final pass matters more than which disc you bought.
If you’re weighing DIY against hiring out, the honest answer depends on scope, not skill. A single patch or one wall is a reasonable weekend project with the right gear. A full room, textured surfaces, or a home with occupants sensitive to dust tips the scale toward professional help, where containment and cleanup are planned as carefully as the sanding itself.
Get a Low-Dust Finish Without Buying the Equipment
Renting or buying a net-abrasive setup and a rated extractor makes sense for a single wall. For a full flat or condo, the math changes fast once you factor in equipment cost, cleanup time, and the risk of missed dust settling under your primer coat. 5starpainting handles the entire process, from surface prep through final cleanup, so you skip the equipment learning curve entirely.

Every job includes meticulous prep, genuine Nippon Paint application, furniture protection, and a dedicated project manager overseeing the work from start to finish, all under one all-inclusive price with no hidden fees. If you’re preparing an HDB flat for a fresh coat, the HDB painting services page outlines what’s included starting from $600. Condo owners can check the condo painting services page for packages starting from $950. Either way, you can request a quote today and have a project manager walk through your space before any sanding or painting begins.
Sources
- The Best Sander and Sanding Vacuum for Drywall – Fine Homebuilding
- 3M Xtract™ Pneumatic Random Orbital Sander 88956 – 3M
One Response