
BLUF: Most uneven paint coverage gets fixed by letting the paint cure fully, priming the porous or patched areas (or the entire wall if problems are widespread), then applying one or two full, even topcoats with the right roller and technique. This handles flashing, roller marks, and thin spots in nearly every case.
Here’s the quick checklist before you grab a brush:
- Let the wall dry 24 to 48 hours before judging the finish.
- Identify whether you’re dealing with flashing (dull patches) or roller texture (raised lines).
- Sand lightly if you feel ridges or texture.
- Prime the problem spots or the whole wall, depending on severity.
- Recoat corner to corner, not just the trouble spots.
- Inspect again after the final coat cures.
Call a professional if you’re facing a whole-house skim coat, flashing across multiple rooms, or you want a warranty backing the finish.
Key Takeaways
Uneven paint coverage is almost always a substrate absorption problem, and priming the affected area (or the whole wall) before recoating solves it more reliably than any amount of extra topcoat alone.
| Point | Details |
|---|---|
| Diagnose before you fix | Flashing, roller marks, and thin coats each need a different repair, so identify the cause first. |
| Prime to equalize porosity | Whole-wall priming fixes multiple patches or flashing better than spot-priming, which often leaves a halo. |
| Match roller nap to sheen | Use 3/8-inch nap for flat and satin, 1/4-inch nap for semi-gloss and gloss, to avoid roller texture. |
| Budget for two full coats | Plan for primer plus two even topcoats rather than stretching a single coat over a repaired wall. |
| Consider a professional finish | 5starpainting pairs meticulous prep and genuine Nippon Paint with a one-year warranty for a repair that won’t need redoing. |
Table of Contents
- Diagnosing Your Uneven Paint Coverage Fix
- How Do You Repair Uneven Paint Coverage Step by Step?
- What Roller and Primer Should You Actually Buy?
- Should You Spot-Prime or Prime the Entire Wall?
- Preventing Uneven Coverage Next Time
- Why Professionals Prime First and When to Call One
- How Do Temperature and Humidity Affect Paint Evenness?
- Common Mistakes That Cause (or Worsen) Uneven Coverage
- Which Paint Formulations Give You Better Coverage?
- What the Research Actually Tells You About Fixing Patchy Walls
- How 5 Star Painting Helps When DIY Isn’t Worth the Risk
- Sources
Diagnosing Your Uneven Paint Coverage Fix
Not every patchy wall has the same cause, and the fix changes depending on what you’re actually looking at. Get the diagnosis wrong and you’ll waste a weekend repainting the same spot twice.
Flashing shows up as dull, matte patches scattered across an otherwise even sheen. It happens because joint compound, drywall patches, and spot-cleaned areas absorb paint at different rates than the surrounding drywall paper. Hold a flashlight at a low angle across the wall (raking light) and the flashing pattern jumps out immediately, even when it’s invisible under normal room lighting.
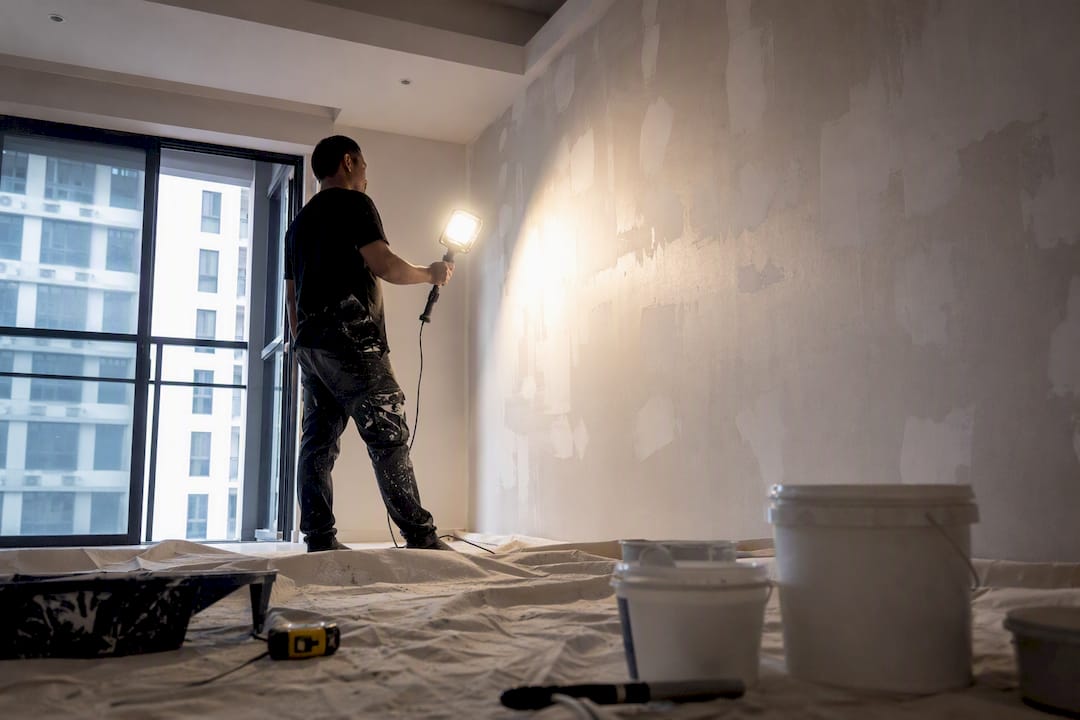
Roller marks and lap lines look like faint stripes or ridges running the direction you rolled. These come from using the wrong nap length, rolling over paint that’s already started to dry, or simply losing your wet edge halfway across a wall.
Thin or translucent patches happen when you didn’t load the roller enough or tried to stretch one gallon further than it should go.
Contamination or stains bleeding through need a stain-blocking primer, not another coat of wall paint. Regular topcoats won’t seal in nicotine, water stains, or marker.
The underlying issue in most flashing cases comes down to uneven binder coalescence: porous joint compound pulls binder out of the wet paint film faster than the surrounding drywall paper does, so the film never forms evenly and you end up with that duller, slightly rougher patch.
How Do You Repair Uneven Paint Coverage Step by Step?
Once you know what you’re dealing with, the repair itself follows a predictable order. Skipping steps is exactly how a simple touch-up turns into a second full repaint.
- Inspect in daylight and wait for full cure. Paint often looks uneven while it’s still curing, so give it at least 24 to 48 hours before you make any final call. What looks patchy on day one can look completely different by day two.
- Sand if you feel texture. Run your palm across the wall. If you catch ridges or roller stipple, sand lightly with 180 to 220 grit, then vacuum and wipe down with a tack cloth to clear every trace of dust before you touch a primer can.
- Decide between spot-priming and whole-wall priming. One or two small, isolated patches get a spot-prime with the edges feathered out about 6 inches, sometimes called a halo. Multiple patches, a high-sheen topcoat, or flashing spread across more than a small section calls for priming the entire wall instead.
- Choose the right primer. A basic PVA primer handles routine sealing on flat-finish walls. For heavily patched or skim-coated surfaces, or any wall under critical lighting, step up to a higher-solids primer like Bulls Eye 1-2-3 or a penetrating primer like Gardz, both of which seal porous compound more completely than a basic sealer.
- Apply your first full topcoat. Use a W or M pattern, reload the roller often, and always roll back into your last wet section rather than crossing into paint that’s already begun to set.
- Let it dry, then apply a second full coat. Inspect again after 24 to 48 hours under both daylight and raking light before deciding the wall is finished.
Following an identify, cure, sand, prime, recoat sequence in that exact order is what separates a repair that holds up from one you’ll be redoing next month.
Pro Tip: Keep a work light on a stand at a low angle while you paint, not just for inspection afterward. Catching a thin spot while the roller is still in your hand saves you an entire extra coat later.
What Roller and Primer Should You Actually Buy?
The tools you use matter as much as the technique, and this is the part most DIYers skip past.
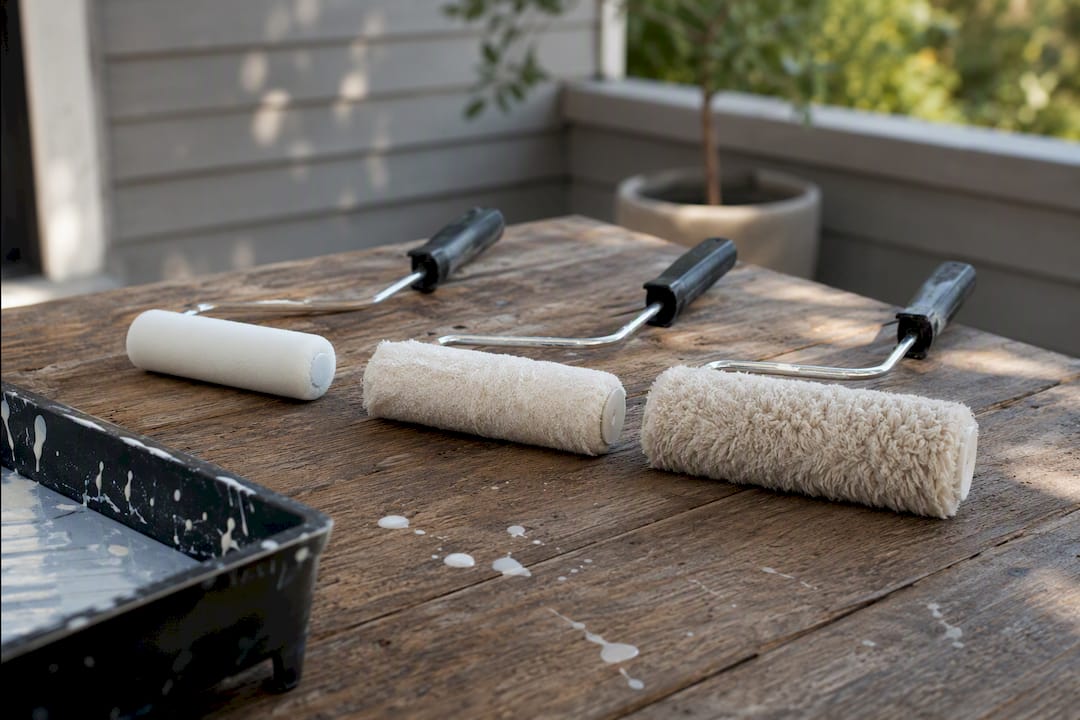
Nap length is not a minor detail. A 3/8-inch nap works for flat and satin finishes on smooth interior drywall, while semi-gloss and gloss paints need a shorter 1/4-inch nap. Use the wrong one and you’ll get textured stipple marks baked right into a sheen that’s supposed to look glassy smooth.
Roller cover quality matters more than most people expect. A cheap, lint-shedding cover releases paint unevenly no matter how careful your technique is, while a good lint-free microfiber or tightly woven cover, typically $10 to $15, holds and releases paint consistently across the whole stroke. Investing in tools and technique often solves a problem homeowners were blaming on the paint itself.
On primers: general PVA formulas cover basic sealing jobs fine. Heavily patched or skim-coated walls need a higher-solids or penetrating primer. Stains that bleed through call for a shellac-based primer, since regular sealers won’t hold them back.
Sheen changes your margin for error too. Flatter finishes hide minor flashing well. Eggshell and satin show every inconsistency, so budget for a primer coat plus two full topcoats rather than hoping one coat gets you there.
Should You Spot-Prime or Prime the Entire Wall?
This decision trips up more DIY painters than any other step in the process, and getting it wrong usually makes the wall look worse, not better.
Spot-priming works when you’re dealing with one or two small, isolated repairs. Feather the primer edge out about 6 inches beyond the patch so it blends rather than leaving a hard line.
Whole-wall priming becomes the better call once you’ve got multiple patches scattered across the surface, you’re applying a higher-sheen topcoat, or the flashing covers a meaningful portion of the wall. Priming only the patches themselves commonly leaves a visible halo around each repair, because the surrounding wall still absorbs paint at a different rate than the primed spot does.
That’s also why priming the whole wall is often faster in practice than it sounds. It equalizes porosity across the entire surface in one pass instead of forcing you to chase halos and touch-ups spot by spot for the rest of the project.
Plan your material budget around primer plus two full topcoats, not a single stretched coat. Spot-topcoating only the dull patches without priming first tends to backfire, too. The topcoat sits thicker and glossier over those small islands, which usually makes the contrast more obvious, not less.
Preventing Uneven Coverage Next Time
Most repeat problems trace back to the same three habits: rushed prep, rushed technique, or not buying enough paint.
- Prep thoroughly. Clean the wall, sand any rough spots, and spot-prime repairs. If you used a degreaser anywhere, rinse it off completely so the whole wall absorbs paint evenly.
- Slow down your rolling technique. Reload the roller often, use a W or M pattern, and work in manageable 3 to 4 foot sections from corner to corner while keeping a wet edge the entire time.
- Buy enough paint upfront. Plan for a full primer coat plus two topcoats, and test your color in the room’s actual lighting before you commit to a sheen.
- Check your work under raking light. Daylight alone can hide flaws that jump out the moment you tilt a work light sideways across the wall.
Pro Tip: Paint one full wall’s worth of primer before you touch the topcoat, even if you’re tempted to alternate. Mixing primer and topcoat steps room by room makes it much harder to catch a missed spot before it’s too late to fix cleanly.
Why Professionals Prime First and When to Call One
The pattern holds up across almost every uneven paint job: the walls that need the fewest callbacks are the ones where someone took surface prep and primer selection seriously before the first topcoat went on. Skipping that step to save an afternoon usually costs more time later in touch-ups that don’t quite match.
A wall covered in a mix of patched drywall, old touch-ups, and bare compound will absorb paint unevenly no matter how good the topcoat is. The fix has to happen at the primer stage, not the topcoat stage.
That’s the core of Fabian’s approach at 5starpainting: meticulous prep and the right primer choice up front, backed by a one-year warranty on the finished work. For a full room repaint, a multi-patch flashing problem, or any job where the lighting is unforgiving, a professional crew with proper project management tends to save homeowners from the repeat-touch-up cycle entirely.
How Do Temperature and Humidity Affect Paint Evenness?
Paint doesn’t cure the same way in every room, and weather is often the invisible variable behind coverage that looked fine on the roller but dried patchy.
High humidity slows evaporation, which keeps your wet edge open longer. That sounds helpful, but it also means the paint stays soft and prone to marking longer than usual, so accidental touches or dust settling into the film can create texture you didn’t notice while painting. Very dry, hot conditions do the opposite: they speed evaporation so much that your roller strokes start setting up before you can blend into them, which is a common cause of visible lap lines in rooms with direct sun or running air conditioning.
Cold rooms slow the entire cure process, sometimes stretching a “24 hour” recoat window into two or three days. Paint applied too soon over an undercured coat can trap moisture underneath, leading to soft spots or an uneven sheen once everything fully dries.
The practical fix is simple: keep the room at a moderate, stable temperature, ideally between 65 and 85 degrees Fahrenheit, and avoid painting during unusually humid stretches if you can wait a day. Skip the fans and space heaters aimed directly at wet paint. They dry the surface faster than the film underneath, which is exactly the kind of uneven drying that produces the blotchy look you’re trying to avoid in the first place.
Common Mistakes That Cause (or Worsen) Uneven Coverage
A lot of patchy paint jobs aren’t caused by bad paint at all. They’re caused by a handful of repeatable mistakes.
Painting over unwashed walls. Dust, grease near light switches, and kitchen residue all change how paint bonds and dries, which shows up later as subtle sheen differences.
Skipping primer to save a trip to the store. This is the single most common reason flashing shows up in the first place. Bare compound and painted drywall simply don’t absorb paint the same way.
Stretching one gallon too far. Thin, starved paint film is one of the fastest routes to translucent, uneven patches, especially with darker colors.
Losing the wet edge. Stopping mid-wall for a phone call or a snack break lets the edge start drying, and rolling back into it afterward creates a visible lap line that no amount of extra coats fully erases.
Touching up only the flaw instead of the whole wall. A single dab of paint over a scuff almost always dries a slightly different sheen than the surrounding area, especially in satin or eggshell finishes.
Rushing between coats. Recoating before the first layer has properly cured traps moisture and unevenness underneath a topcoat that looks fine for a day or two before the flaws reappear.
Avoiding these six habits solves more coverage problems before they start than any product upgrade could fix afterward.
Which Paint Formulations Give You Better Coverage?
Not all paint is formulated the same way, and the differences show up directly in how forgiving a wall is to work with.
Paints with higher solids content, meaning more pigment and binder relative to solvent or water, build a thicker, more opaque film per coat. That extra film thickness is exactly what determines whether a primer or paint equalizes porosity between joint compound and paper-faced drywall, rather than the brand name on the can. Genuine Nippon Paint products, which is what 5starpainting uses on every job, are formulated with that film-build and hide in mind, which is part of why a properly prepped and primed wall painted with a quality formulation needs fewer corrective coats than a budget option applied the same way.
Flat and matte finishes are naturally more forgiving because they scatter light rather than reflecting it, which hides minor flashing and roller texture. Satin and eggshell sit in the middle: attractive and washable, but unforgiving of any prep shortcuts. Semi-gloss and high-gloss reflect the most light, which means they show every roller mark, lap line, and uneven patch with almost no mercy, so they demand the most careful priming and technique of any sheen.
When you’re choosing a paint, look past the marketing claims on the can and check the solids content or coverage rating per gallon if it’s listed. A paint with good coverage at full strength will always give you a more even result than a thinner formulation stretched to match the same claim.
What the Research Actually Tells You About Fixing Patchy Walls
Most advice on patchy walls treats the topcoat as the problem, and that’s backwards. Every credible repair sequence, from professional guides to manufacturer documentation, points to the same conclusion: uneven coverage is a substrate problem wearing a paint problem’s clothes. The wall absorbs unevenly, and no amount of extra topcoat fixes that until you equalize the surface first.
Where conventional advice falls short is the instinct to spot-treat. Dabbing primer or paint on just the visible flaw feels efficient, but it usually just relocates the problem, trading one halo for another. The reader’s real priority should be diagnosis before action: identify whether you’re looking at flashing, lap lines, or thin film, because each one has a different fix, and guessing wrong wastes both paint and a weekend.
If there’s one habit worth adopting from this whole process, it’s treating primer as the actual repair step and the topcoat as the finish, not the other way around. Get comfortable with using primer correctly before you ever pick up a topcoat roller.
How 5 Star Painting Helps When DIY Isn’t Worth the Risk
If you’ve read through the diagnosis, priming, and recoating steps above and you’re weighing whether to spend another weekend chasing halos yourself, there’s a faster route. 5starpainting handles the entire uneven-coverage problem for you, starting with meticulous surface prep, correct primer selection for your specific substrate, and full application using genuine Nippon Paint. Every job comes with all-inclusive pricing covering labor, furniture protection, and cleanup, with no hidden fees added after the quote.

Each project gets a personal project manager assigned from start to finish, and the finished work carries a one-year warranty, which matters most if you’ve got multiple flashing patches, a tight moving-in schedule, or a high-sheen finish where every imperfection would show. That combination of prep discipline and warranty coverage is exactly what turns a shaky DIY repaint into a finish you won’t be touching up again next season.
If your walls need more than a weekend touch-up, request a quote for HDB painting services or check condo painting packages to get a fixed price before you commit to a date.
Sources
- The ultimate paint roller nap guide — choose the right cover for your project
- How to Fix Uneven Paint Coverage
2 Responses