
A complete interior painting checklist covers five areas: supplies (brushes, rollers, tape, drop cloths), prep (cleaning, patching, sanding), protection (floors, furniture, fixtures), application order (ceiling to trim to walls), and cleanup. The three tasks that most often derail a start date are clearing rooms, patching holes, and buying enough paint the first time.
TL;DR:
- Proper surface preparation, including clearing, cleaning, patching, and priming, is essential for a professional finish and prevents patchy results.
- Using the right tools, such as specific brushes, rollers, tapes, and drop cloths, minimizes delays caused by missing or inadequate supplies.
- Protecting floors, furniture, and fixtures with suitable materials reduces cleanup time and prevents accidental paint damage during application.
- Painting should follow a specific order—ceiling first, then trim, and walls last—to avoid drips and facilitate a cleaner workflow.
- Waiting at least 24 to 48 hours before moving furniture back allows paint to cure properly and prevents scuffs or impressions.
Table of Contents
- Interior Painting Checklist: Tools and Supplies to Gather First
- Preparation Checklist Before You Pick Up a Brush
- How Do You Protect Floors, Furniture, and Fixtures?
- What’s the Right Order for Painting a Room?
- How Much Paint Do You Actually Need?
- How Long Should Paint Dry Before You Move Furniture Back?
- Day-of Walkthrough: What You Handle vs. What the Crew Handles
- Post-Painting Cleanup and Final Inspection Checklist
- One-Page Interior Painting Checklist You Can Print
- Why a Checklist Beats a Good Memory on Painting Day
- How 5starpainting Covers Everything on This Checklist
- Sources
Interior Painting Checklist: Tools and Supplies to Gather First
Most delays trace back to a missing tool, not a missing skill. Build your kit before you touch a wall.
- Brushes: a 2.5 inch angled sash brush for cutting in corners and trim, plus a wider flat brush for large touch-ups.
- Rollers: 9 inch frames with 3/8 inch nap covers for smooth drywall, 1/2 inch nap for lightly textured walls.
- Trays and liners: at least two, so you’re not scrubbing between colors.
- Painter’s tape: a sharp-edge tape for trim and a delicate-surface tape for wallpaper or freshly painted surfaces.
- Drop cloths, sandpaper (120 and 220 grit), spackle, a putty knife, a sturdy stepladder.
Nippon Paint Singapore’s tools checklist lists similar staples, including scrapers and masking film, as the baseline kit for local DIY jobs.
Pro Tip: Buy one extra roller cover per room. A matted, dried-out roller is the fastest way to leave streaks on your second coat.
Preparation Checklist Before You Pick Up a Brush
Surface prep decides whether your paint job looks professional or patchy, regardless of the paint you buy. Work through this sequence in the days before painting starts:
- Clear the room. Remove artwork, small furniture, and wall decor. Bag switch plate screws and tape them to the back of the cover plate so nothing goes missing during reinstallation.
- Clean the walls. Dust and light grime wipe off with water and mild soap; kitchens, bathrooms, and smoker’s homes often need TSP or a degreasing cleaner to strip oils the paint would otherwise resist. Wear gloves and ventilate the room when using stronger cleaners.
- Patch and sand. Fill nail holes and small dents with spackle, then sand smooth once dry. Cracks wider than a coin or damaged drywall sections are worth booking a professional repair rather than risking an uneven patch.
- Prime where needed. Bare drywall, patched spots, stains, or a major color change (dark to light) all call for a primer coat before paint goes on.
Lowe’s homeowner prep checklist follows this same clean, patch, sand, prime sequence, and a room-by-room prep guide breaks out realistic time estimates for each task, which is useful if you’re scheduling prep around a workweek.
How Do You Protect Floors, Furniture, and Fixtures?
Overspray and dripped paint cause more cleanup headaches than the painting itself. Match your protection material to the surface:
- Floors: canvas drop cloths grip better than plastic and won’t send you sliding off a ladder; save thin plastic sheeting for quick, disposable coverage in tight corners.
- Trim and edges: run painter’s tape along baseboards, window frames, and door casings, pressing the edge firmly so paint can’t seep underneath.
- Fixtures: cover light fixtures, ceiling fans, and curtain rods with plastic bags secured by tape rather than removing them entirely.
- Air and access: keep vents closed during painting, run a fan for ventilation once coats go on, and keep pets and kids out of the room until surfaces are dry to the touch.
What’s the Right Order for Painting a Room?
Sequence matters as much as technique. Sherwin-Williams’s painting checklist frames every project around four stages: prep, protect, apply, and finish, and that order holds inside the room too.
- Ceiling first, so any drips land on walls you’re about to repaint anyway, not on a finished surface.
- Trim and doors next, since it’s easier to tape off finished trim than to cut a clean line around wet walls.
- Walls last, cutting in corners and edges with a brush before rolling the open field.
- Roll in a “W” pattern, then fill it in while the edge stays wet, working in manageable sections so lap marks don’t form.
- Apply two coats for most colors, especially reds, yellows, and dramatic color changes, which rarely cover fully in one pass.
Rinse brushes and rollers between coats if you’re pausing for more than an hour, or wrap them tightly in plastic to skip the cleanup and pick up again the next day.
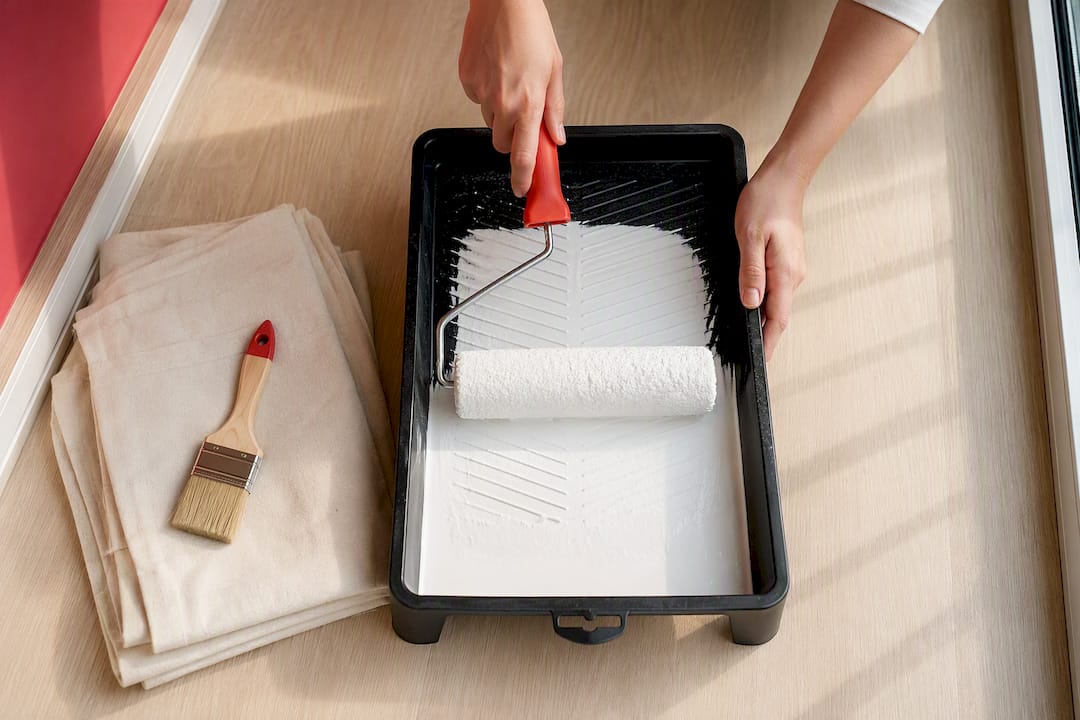
Pro Tip: Load your roller, then run it back over the tray’s ribbed section a few extra times. Overloaded rollers are the top cause of drips along baseboards.
How Much Paint Do You Actually Need?
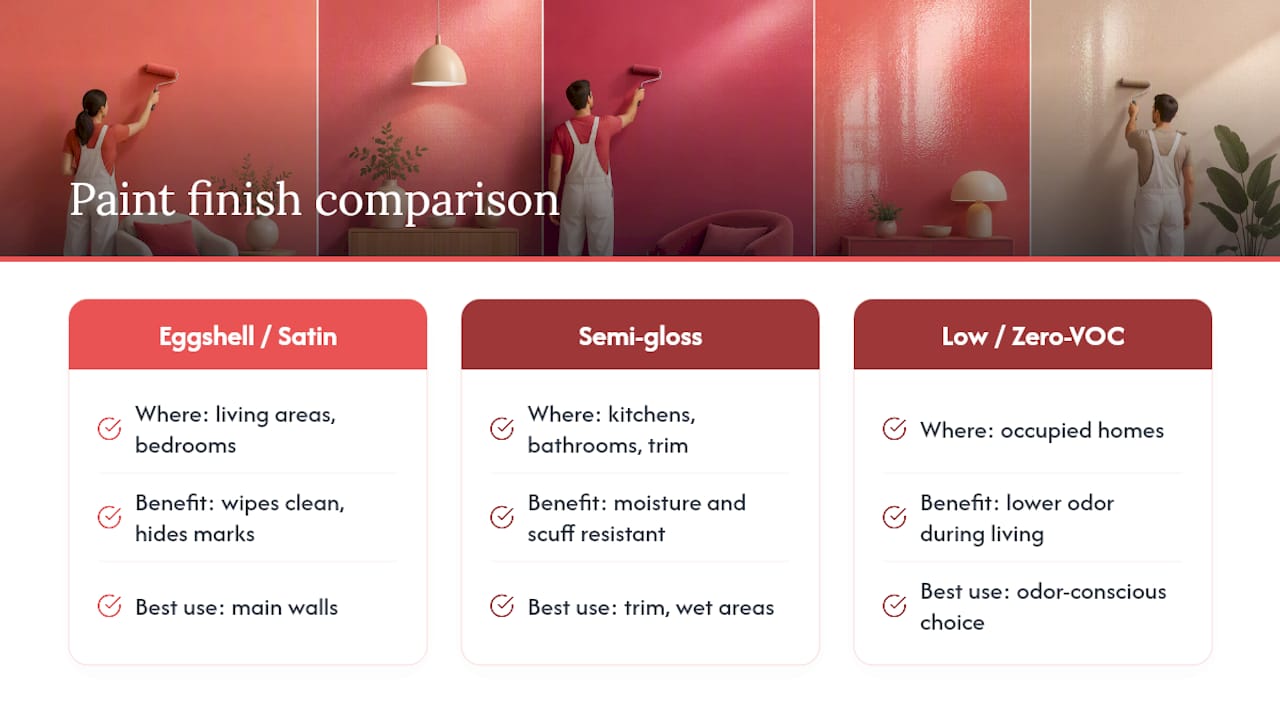
Match the finish to the room: eggshell or satin for living areas and bedrooms, since they wipe clean without showing every roller mark, and semi-gloss for kitchens, bathrooms, and trim where moisture and scuffing are a factor. If you’re painting an occupied home, look for low or zero-VOC formulas to cut down on odor while the household is still living there.
For quantity, most manufacturers list coverage per liter on the can. Calculate your wall area, divide by that coverage figure, and add 10 to 15% on top for touch-ups, trim cuts, and second coats. A paint coverage calculator or a guide on how much paint a room needs can save you a second trip to the store.
How Long Should Paint Dry Before You Move Furniture Back?
Dry to the touch and fully cured are two different things. Most walls feel dry within a few hours, but the paint film keeps hardening for days. Asian Paints recommends waiting at least 24 to 48 hours before heavy furniture contact, longer in humid conditions, to avoid scuffs and permanent impressions in the still-soft finish.
- Keep furniture pulled a few inches off the wall for the first two days.
- Run fans or open windows to speed air circulation.
- Choose a low-VOC paint if you need the room back in service fast.
Day-of Walkthrough: What You Handle vs. What the Crew Handles
Before painters start, walk each room and confirm scope out loud: which walls, whether ceilings and closets are included, and the agreed finish for trim. This single step prevents most day-one disputes.
- You handle: clearing personal items, confirming color choices, and being reachable for questions.
- The crew handles: masking, floor protection, priming, and major repairs.
- Ask the crew lead: who’s your point of contact for daily updates, and what happens if hidden damage turns up mid-job.
5starpainting assigns a dedicated project manager to every job and quotes all-inclusive pricing with genuine Nippon Paint, so labor, materials, and cleanup are settled before work starts, not negotiated afterward.
Post-Painting Cleanup and Final Inspection Checklist
Before you sign off, walk the room in daylight and check for full coverage, no drips, and consistent sheen along every wall.
- Pull tape at a low angle while the paint is still slightly tacky to prevent peeling.
- Wait at least two weeks before wiping painted walls with anything beyond a dry cloth.
- Photograph any touch-up spots and confirm what the cleanup package and warranty cover before final payment.
One-Page Interior Painting Checklist You Can Print
| Category | Quick check |
|---|---|
| Supplies | Brushes, rollers, tape, drop cloths, spackle, sandpaper on hand |
| Top 3 prep tasks | Clear room, patch holes, clean grease spots |
| Protection | Canvas drop cloths down, trim taped, fixtures bagged |
| Coats | Two coats for most colors, primer where needed |
| Cure time | 24 to 48 hours before moving furniture back |
Save or screenshot this table for the morning painting starts.
Why a Checklist Beats a Good Memory on Painting Day
Most day-one delays I’ve seen trace back to one thing: a room that wasn’t actually ready when the crew arrived. Furniture still in place, outlet covers still on, nobody sure which closet was in scope. A written checklist and a project manager who confirms scope beforehand fix both problems before they cost you a half-day.
— Fabian
How 5starpainting Covers Everything on This Checklist
If working through supplies, prep, protection, and application yourself sounds like more time than you have, 5starpainting’s all-inclusive packages handle the full list for you. Every job includes:

- Labor and genuine Nippon Paint, already factored into one fixed quote.
- Furniture protection and full post-job cleanup, no separate line item.
- A dedicated project manager coordinating the crew from day one to sign-off.
- A one-year warranty covering the finish after the job wraps.
Hiring a pro makes the most sense when you’re facing large wall repairs, a tight move-in deadline, or you simply want the warranty backing the work. Check HDB painting packages starting from $600, or visit 5starpainting to get a quote for your unit.
Sources
- Painting Project Checklist
- How to Prep Your Home for Painting: A Homeowner’s Checklist
- Painting Tools Checklist – Singapore
- How long to wait between coats of paint (Asian Paints)
- Painting Prep Work Checklist: Tasks, Time & Materials | PriceTable
2 Responses