
Use lightweight spackle for nail holes, a self-adhesive mesh or metal patch for medium punctures, and a drywall patch with backing strips for anything larger than 4 inches. Plaster walls need stabilization before any cosmetic fill goes on. Most of these jobs take under 30 minutes of active work, but plan for 1 to 3 days total once you count drying time between coats and priming before you paint.
TL;DR:
- Small nail holes and dents can be repaired quickly with lightweight spackle, usually within 30 minutes of active work and minimal drying time.
- Medium holes between half an inch and four inches require reinforcement with mesh or metal patches before applying joint compound in multiple thin coats to prevent cracks.
- Large holes over four inches need a backing strip with drywall screws and a layered finishing process, including taping, sanding, and priming, for a durable repair.
- Plaster wall repairs demand stabilization with bonding adhesive or PVA primer, followed by matching plaster or joint compound, especially if the plaster has pulled away from the lath.
- Professional patching and painting services often save time and ensure lasting results, especially with multiple rooms or complex damage, with prices starting from $600 in HDB or $950 in condos.
Table of Contents
- What Tools and Materials Do You Need for Patching Wall Holes?
- How Do You Patch Nail Holes and Tiny Dents?
- How Do You Fix Medium Holes With a Mesh or Metal Patch?
- What Is the Backing Patch Method for Large Holes?
- How Do You Repair Holes in Plaster Walls?
- How Do You Finish and Blend a Patched Wall Before Painting?
- What Are the Most Common Patching Mistakes?
- When Should You DIY vs. Hire a Painting Contractor?
- Skip the Guesswork With Professional Patching and Painting
- Sources
- FAQ
What Tools and Materials Do You Need for Patching Wall Holes?
The right kit depends entirely on hole size, so gather materials by category before you start rather than mid-repair. For nail holes and tiny dents, keep it simple: lightweight spackle, a 2-inch putty knife, a sanding sponge, primer, and touch-up paint.
Medium holes call for a self-adhesive fiberglass mesh patch or a small metal patch, all-purpose joint compound, a set of 6 to 10-inch knives, and a sanding block. Large holes need scrap drywall, 1×3 backing strips, drywall screws, a drywall saw, paper tape, and joint compound in bigger quantities than you’d think.
Plaster repairs are their own category entirely, requiring a bonding adhesive or PVA primer, a plaster mix, a margin trowel, and sometimes a scarifier to rough up old surfaces for better adhesion.
- Drop cloth or old sheet to protect flooring
- Dust mask and safety goggles, especially for sanding and plaster work
- Shop vacuum or tack cloth for cleanup between steps
- Good ventilation, particularly when working with bonding adhesives
A small-hole repair typically costs under $10 to $55 in materials, and even a full drywall patch job rarely costs very much for DIY materials.
How Do You Patch Nail Holes and Tiny Dents?
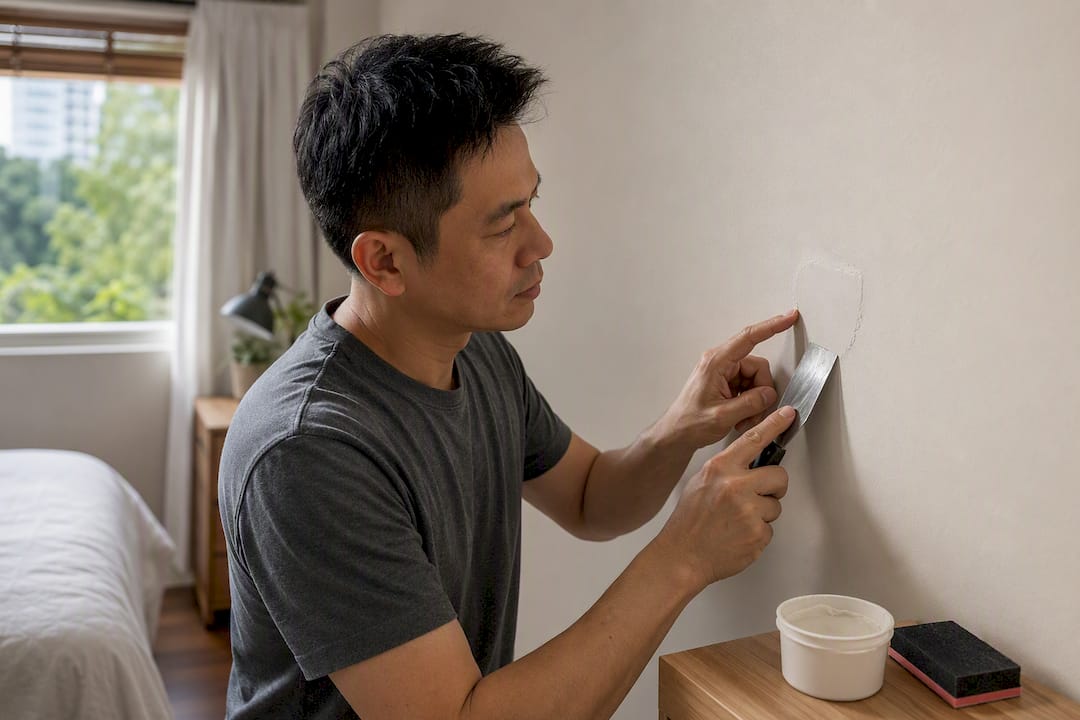
Nail holes, screw holes, and picture-hanger dents under half an inch are the fastest repair in this guide, and lightweight spackle handles them best.
- Remove any loose paint flakes around the hole and lightly sand the area.
- Wipe away dust with a damp cloth so the spackle adheres cleanly.
- Press spackle into the hole with your putty knife, slightly overfilling it.
- Smooth the excess flush with the wall surface using one clean swipe.
- Let it dry fully per the product label. Most lightweight spackles set in 30 to 60 minutes, though quick-setting formulas cure faster.
- Sand lightly with 120-grit paper once dry, then prime the spot and paint.
Active work runs about 10 to 30 minutes; drying adds another 30 to 60 minutes or more depending on humidity and product.
Pro Tip: Run your fingertip or the flat edge of a putty knife across the dried patch before sanding. If you feel a ridge, you’ll see it under paint too. Quick-setting spackle saves time but gives you a shorter window to feather the edges smooth, so work fast.
How Do You Fix Medium Holes With a Mesh or Metal Patch?
Punctures between roughly half an inch and 4 inches, the kind left by a doorknob or a moved shelf bracket, need reinforcement before you fill them. Self-adhesive fiberglass mesh or a small metal patch gives the compound something to grip instead of sagging into open air.
- Sand ragged edges smooth and clear away any torn paper facing or loose debris.
- Center the mesh or metal patch directly over the hole, pressing it flat against the wall.
- Apply a thin first coat of joint compound over the patch, feathering it 2 to 4 inches beyond the edges.
- Let it dry overnight, then sand lightly.
- Apply a second thin coat, slightly wider than the first, and let it dry again.
- Apply a third finish coat for a seamless blend, sand smooth, and spot-prime before painting.
Applying compound in three thin passes rather than one thick one prevents shrinkage cracks and cuts your sanding time significantly, since thick single coats tend to crack as they dry and pull away from the mesh.
If your wall has a knockdown or orange-peel texture, match it before the final coat sets by thinning compound with water at roughly a 10:1 ratio, flicking it on with a chip brush, and flattening it with a knockdown knife after 15 to 30 minutes.
What Is the Backing Patch Method for Large Holes?
Holes 4 inches or wider, think doorknob punches through drywall or accidental furniture damage, need a structural fix, not just a cosmetic fill. The backing strip, sometimes called a California patch, gives the repair something solid to screw into instead of floating unsupported in open wall cavity.
- Cut the damaged area into a clean rectangle using a drywall saw.
- Measure the opening and cut a drywall patch to match exactly.
- Insert 1×3 wood backing strips behind the opening on each side, securing them to the surrounding drywall with screws.
- Screw the new patch into the backing strips, countersinking each screw slightly below the surface.
- Embed paper tape into wet joint compound over every seam. Tape must go into wet mud, not stick onto dry compound, or air pockets form underneath.
- Apply a tape coat, let it dry, then apply two finish coats, each wider than the last, sanding lightly between coats.
- Feather the final coat 8 to 10 inches beyond the seams so the transition disappears under paint.
- Prime the entire repaired area before repainting to match texture and sheen.
Skip the DIY route and call a licensed contractor when you spot any of these:
- Exposed or damaged electrical wiring near the hole
- Signs of structural damage to studs or framing
- Widespread plaster deterioration beyond a single patch
How Do You Repair Holes in Plaster Walls?
Plaster over lath behaves nothing like drywall, and skipping the stabilization step is the single biggest reason plaster patches fail within weeks. If the plaster has pulled away from its wood lath backing, filling the visible hole without reattaching the plaster first is a temporary fix at best.
Check for loose or hollow-sounding plaster by tapping gently around the damaged area. If you find it, drill small holes and inject a bonding adhesive or PVA primer into the gap between plaster and lath, then let it cure before touching the surface repair.
- Apply a base coat of plaster mix, cross-scratching it while wet to help the next layer grip.
- Let the base coat dry fully, then apply a finish coat flush with the surrounding wall.
- Sand gently once cured, then prime the entire area.
- Wear a dust mask when sanding old plaster, since older compounds in some homes may contain materials worth handling carefully.
Extensive delamination across multiple walls or ceilings is a job for a plaster specialist, not a weekend project.
How Do You Finish and Blend a Patched Wall Before Painting?
Priming isn’t optional. Skipping it is one of the most common reasons a patch shows through as a dull or shiny spot under certain light, an effect painters call flashing. A drywall primer or PVA primer seals the porous patch so it absorbs paint the same way the surrounding wall does.
- Sand with 120-grit first, then switch to a finer grit for the final pass.
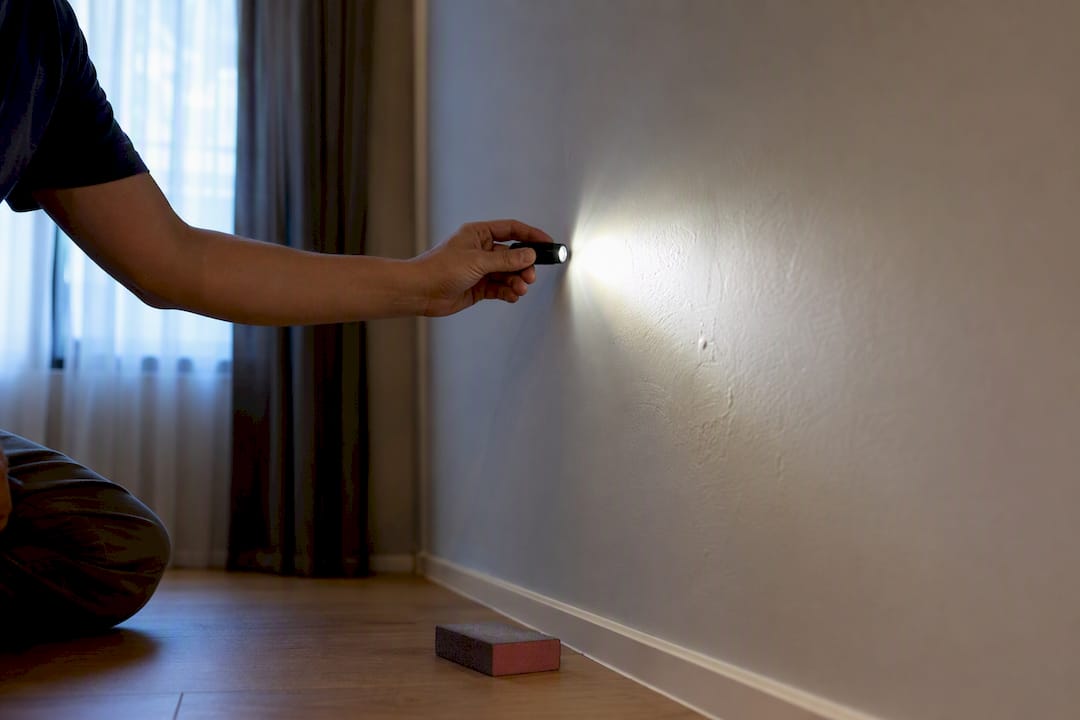
- Wipe the area clean with a tack cloth and inspect under a raking light (a flashlight held at an angle) to catch ridges you’d otherwise miss.
- Prime the patch, feathering slightly onto the surrounding wall.
- For color matching, test paint on a small hidden section first, and tint your primer if the wall color is dark or saturated.
If texture doesn’t match after spot-repair, you may need to respray or reblend a wider section rather than just the patch itself, especially on heavily textured walls.
Pro Tip: Inspect every patch under a raking light before you commit to paint. A flashlight held sideways against the wall reveals every ridge, dip, and sanding mark that overhead light hides completely.
What Are the Most Common Patching Mistakes?
Most failed patches trace back to the same handful of errors, and nearly all of them are avoidable.
- Piling on compound too thick in one pass, which leads to cracking as it dries. Sand it back and recoat thinly instead.
- Skipping the tape coat or letting tape stick to dry compound instead of wet, which causes bubbling and peeling later.
- Leaving loose plaster unstabilized, so the patch pops out again within months.
- Ignoring drying time between coats, which traps moisture and shows up as visible seams once painted.
- Attempting repairs near exposed wiring or recurring structural cracks instead of calling a professional.
When Should You DIY vs. Hire a Painting Contractor?
DIY works well for one or two isolated holes. If you’re patching several rooms or racing a resale deadline, professional prep and color matching from an experienced painting contractor often saves more time than it costs.
Skip the Guesswork With Professional Patching and Painting
A professional painting service handles the patching and priming most DIY guides gloss over, then finishes the job with quality paint for a result that holds up under raking light and repeated inspection. Projects typically have dedicated management overseeing surface prep, patching, furniture protection, and cleanup as one coordinated job rather than a string of separate tasks.

That matters most when you’re staring down several rooms of nail holes, resale-ready walls on a tight timeline, or plaster damage that needs real stabilization rather than a quick cosmetic fill. Since prep work accounts for roughly 40 to 60% of what makes a paint job last, cutting corners there is exactly where DIY jobs and rushed contractors both tend to fail.
Pricing is all-inclusive with no hidden fees for labor, paint, or cleanup. Check the HDB painting packages starting from $600 or the condo painting packages starting from $950, or get a quote through the main service page to see what a full walkthrough and patching plan would look like for your space.
Sources
- How to fix a hole in the wall — This Old House
- How to Patch Drywall: Fix Any Size Hole Step-by-Step — FixUpFirst
- How to patch drywall: small, medium and large hole repair — BobVila
- Step-by-step guide: prepping walls for repaint — Nippon Paint (Singapore)
FAQ
What Is the Best Material to Repair Wall Holes?
Lightweight spackle works best for nail holes and tiny dents, while joint compound over a mesh or metal patch is the standard choice for medium and large holes. Plaster walls need a bonding adhesive first, then a matching plaster or joint compound finish coat.
How Do You Patch a Hole in a Wall?
Small holes just need spackle pressed in, smoothed flush, dried, and sanded. Medium and large holes require a mesh patch or drywall backing, followed by two to three thin coats of joint compound feathered progressively wider, then priming before paint.
Do You Need One or Two Pieces of Drywall to Patch a Hole?
One piece of scrap drywall is enough for most large-hole repairs, cut to fit the opening and secured to backing strips. You’d only need multiple pieces for an unusually large or irregularly shaped damaged section.
How Big of a Hole Can You Patch Yourself?
Most DIYers can comfortably handle holes up to a foot or so wide using the backing strip method with drywall, screws, and joint compound. Beyond that, or if studs, wiring, or plumbing are involved, it’s worth bringing in a contractor.
Do Painters Typically Patch Holes and Fix Cracks Before Painting?
Yes, professional painters routinely patch holes, fix cracks, and prep surfaces as part of a full painting job, since surface prep directly determines how long the finish lasts. Services like 5starpainting include this prep work in their all-inclusive pricing rather than billing it separately.