
Yes, you can paint over wallpaper if it’s smooth, firmly glued to the wall, and free of damp or peeling. The one requirement that decides whether the job holds up is sealing the paper first with an oil- or shellac-based primer. Before you buy a single can of paint, inspect the seams and run a small spot test to see how the surface actually reacts.
TL;DR:
- Painting over wallpaper is feasible if the surface is smooth, firmly adhered, and free of moisture, with sealant applied using an oil- or shellac-based primer.
- A spot test on a hidden area helps determine whether paint will adhere properly without bubbling or showing through, reducing the risk of future problems.
- Primers are critical; water-based options can cause bubbling, while solvent-based primers ensure proper sealing and adhesion for latex paints.
- Proper surface preparation, including cleaning, gluing seams, filling gaps, and sanding, is essential for a smooth final finish and long-term durability.
- Hiring professional painters may be the best choice for textured, old, or damp wallpaper, as they handle complex prep and guarantee a more reliable, lasting result.
Table of Contents
- Should You Paint Over Wallpaper or Remove It First?
- What Materials and Tools Do You Actually Need?
- How Do You Prepare Wallpaper for Painting?
- How Do You Apply Primer and Paint Over Wallpaper?
- What Can Go Wrong When You Paint Over Wallpaper?
- What a Painting Contractor Wants You to Know
- What Painting Over Wallpaper Actually Comes Down To
- Want a Guaranteed Finish Without the Guesswork?
- Where This Guide’s Recommendations Come From
- Sources
- FAQ
Should You Paint Over Wallpaper or Remove It First?
Not every wallpapered wall is a good candidate. Some surfaces will take paint beautifully. Others will bubble, peel, or telegraph every seam through your new topcoat within a month.
Watch for these red flags before you commit:
- Peeling in multiple spots. If more than one panel is lifting at the edges, priming over it just hides a problem that will resurface.
- Bubbling or soft patches. These usually mean moisture is already trapped behind the paper.
- Mold or a damp smell. Painting over damp wallpaper traps moisture and mold against the wall. Fix the water source and address the mold before you touch a paintbrush.
- Heavy texture. Grasscloth, embossed vinyl, and other textured papers will show every ridge and seam through even three coats of paint.
- Fabric-backed or thick vinyl wallpaper. These types can hide adhesion problems underneath a top layer that looks fine.
If your wallpaper is firmly stuck, has smooth seams, and shows no active damp or mold, you’re likely in good shape. Minor lifting at a seam or corner is fixable with seam adhesive, not a dealbreaker.
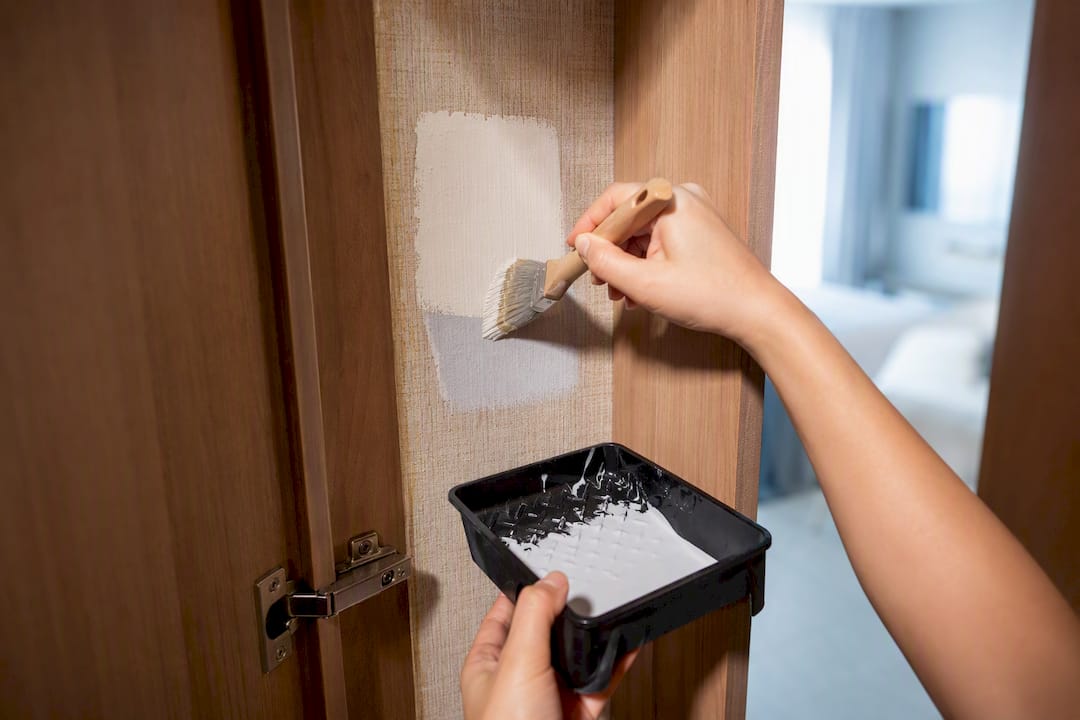
Run a spot test before you commit to the whole room. Pick a hidden section, maybe behind a door or inside a closet, and apply your primer and one coat of paint to a small area. Give it a full day to cure, then check three things: does the paint stick without lifting the paper, is there any bubbling, and does the wallpaper’s pattern or texture show through the dried paint. This five-minute test can save you from repainting an entire room. Contractors treat this step as close to mandatory, and HouseBeautiful’s reporting on painting over wallpaper backs that up: removal is still the preferred route, but painting over smooth, well-adhered paper is a legitimate option when stripping it would risk the wall underneath.
What Materials and Tools Do You Actually Need?
Getting the primer right matters more than any other purchase on this list. An oil-based or shellac-based primer seals the wallpaper and its adhesive against moisture, which is exactly what keeps your topcoat from reactivating old glue. Water-based primers introduce moisture at the wrong moment and can cause the same bubbling and lifting you’re trying to avoid, according to BobVila’s wallpaper-painting guide.
Pro Tip: Once the oil- or shellac-based primer has fully cured, standard latex paint bonds to it without issue. You don’t need an oil-based topcoat, just an oil-based or shellac-based first coat.
For the finish, matte or eggshell sheens hide seams and minor texture far better than satin or gloss, which catch light and highlight every imperfection.
Your shopping list should include:
- Short-nap roller and angled sash brush for cutting in
- Spackle or lightweight joint compound for gaps and holes
- Sanding block, 120 to 220 grit
- Seam adhesive for lifted edges
- Mild cleaning solution (sugar soap or a TSP substitute)
- Painter’s tape and dropcloths
- N95 respirator and a plan for ventilation
Oil- and shellac-based primers carry strong solvent fumes. Open windows, run a fan, and wear an N95 respirator while you work. Dispose of solvent-soaked rags in a sealed metal container, since oily rags can combust on their own if left balled up in a warm garage.
How Do You Prepare Wallpaper for Painting?
Preparation is where most DIY paint jobs over wallpaper succeed or fail. Skipping steps here doesn’t save time. It just moves the problem to after you’ve already opened the paint can.
- Inspect the whole wall first. Walk the room and mark every seam, lifted edge, water stain, and questionable spot with painter’s tape. You want a map of trouble areas before you start, not surprises halfway through rolling.
- Reglue loose seams. Lift the edge slightly, apply seam adhesive underneath, and press it flat with a seam roller or your hand. Let it dry fully, usually a few hours, before moving on.
- Deal with small lifted strips. If a section is peeling badly rather than just lifting at the edge, cut it away with a utility knife and patch the exposed area with joint compound rather than trying to reglue paper that’s already failing.
- Clean with a light touch. Wipe the walls down with sugar soap or a mild detergent on a barely damp sponge. Avoid soaking the paper. Excess water is exactly what reactivates old wallpaper adhesive and causes bubbling before you’ve even primed.
- Fill seams, nail holes, and gaps. Use a lightweight spackle or joint compound, feathering the edges so the patch blends into the surrounding wall. Let it dry according to the product label, typically a few hours for thin applications.
- Sand everything smooth. Once fillers are dry, sand patched areas and raised seams with a 120 to 220 grit block. You’re not trying to remove the wallpaper’s texture entirely, just smooth transitions so they don’t cast shadows under paint.
- Run your spot test now, before priming the whole room. Apply primer and one topcoat to a hidden six-inch square. Wait the full dry time listed on the can, then check for bubbling, adhesion, and whether the pattern shows through.
This sequence mirrors what professional crews do on wallpapered walls, and industry sources describe treating a papered surface with the same care you’d give bare drywall as the real determinant of a clean result, per This Old House’s guide to painting over wallpaper. Homeowners tackling a full room on a timeline may find it useful to map out prep, priming, and topcoat days in advance using a step-by-step interior painting checklist.
Pro Tip: Don’t skip the spot test just because your prep looked clean. Some adhesive failures only show up after a full drying cycle, and catching that on a six-inch square beats discovering it across an entire wall.
How Do You Apply Primer and Paint Over Wallpaper?
Once your spot test confirms the wall is ready, priming technique matters almost as much as primer choice. Cut in around trim, corners, and ceiling lines with an angled brush first, then roll the primer across the open wall in overlapping sections so you don’t leave lap marks where wet primer meets dry.
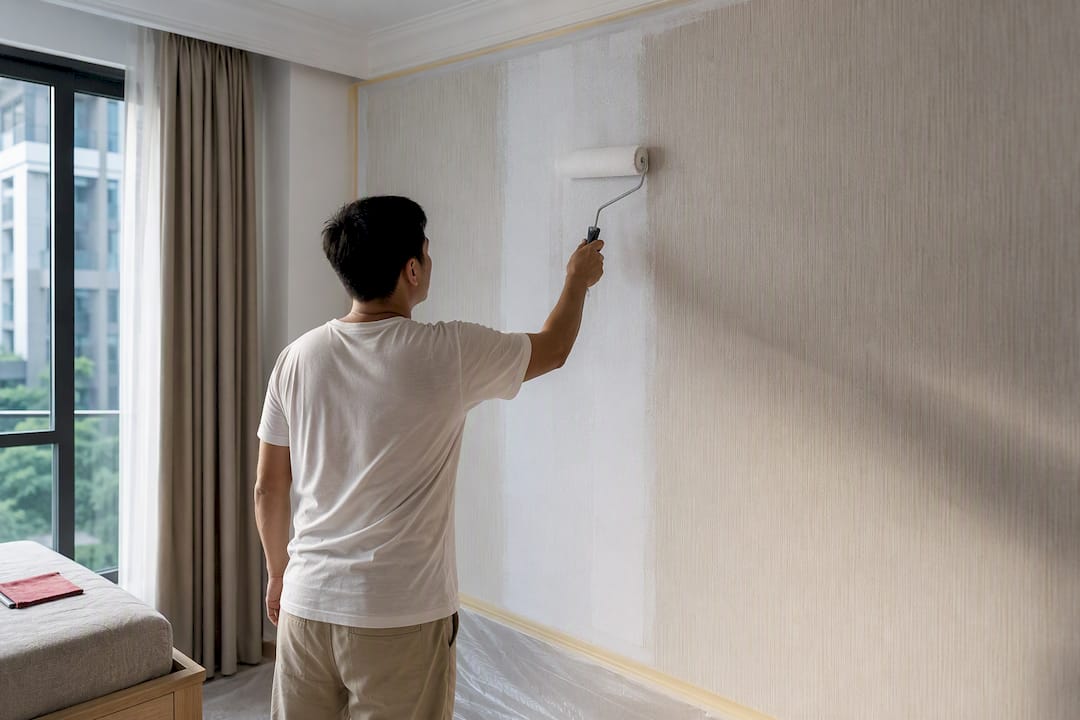
A single coat of oil- or shellac-based primer is usually enough to seal the surface, but let it dry fully according to the label, which often means overnight, before judging whether you need a second coat or moving on to paint. If your wallpaper has a dark background or a bold pattern, ask your paint supplier to tint the primer gray rather than leaving it white. A tinted primer cuts down on how many pigmented topcoats you’ll need to fully hide the pattern underneath, a technique This Old House recommends specifically for busy or dark wallcoverings. This is a similar logic to tinting primer when painting over an existing dark wall color, which this checklist for painting over oil paint also covers in more detail.
For the topcoat, plan on two coats minimum. Use a roller with a nap length suited to your wall’s texture, generally 3/8 inch for smooth wallpaper, and work in overlapping W or M strokes to avoid visible roller lines. Let the first coat dry fully before applying the second; rushing this step is one of the most common reasons seams and texture show through a finished wall.
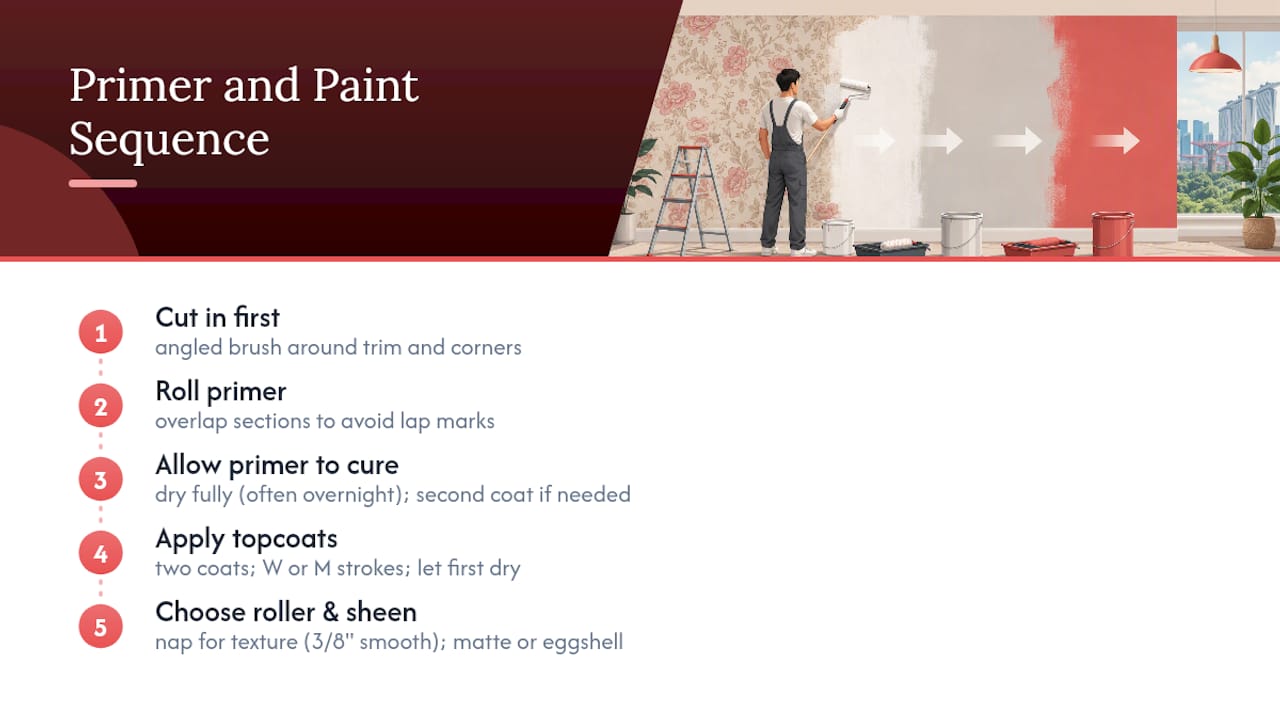
Stick with matte or eggshell finishes. Southern Living’s reporting on the topic notes that higher-sheen paints highlight texture and seams that a flatter finish would otherwise disguise. If you’re also repainting trim or doors in the same room, choosing a complementary finish is worth thinking through, and this guide to interior door colors offers a useful starting point for that decision.
What Can Go Wrong When You Paint Over Wallpaper?
Even careful prep doesn’t guarantee a flawless result. Knowing the common failure points ahead of time means you can catch them early instead of after the whole wall is painted.
- Bubbling after the topcoat goes on. Usually means moisture got trapped, often from over-wetting during cleaning or an incompletely cured primer.
- Seams showing through the paint. A cosmetic issue, not a structural one; a light skim coat of joint compound across the seam, sanded smooth, usually solves it.
- Pattern or texture telegraphing through multiple coats. This is a sign the primer coverage wasn’t sufficient, or the wallpaper’s texture is simply too heavy for painting over to fully disguise.
- Primer failure at seams or edges. If primer doesn’t adhere at a seam, it usually means the seam wasn’t fully cleaned or dried before application.
Beyond these fixable issues, there’s a trade-off worth understanding before you start. Once paint seals wallpaper, the paper, adhesive, and paint film essentially bond into one layer. Removing it later, if you ever change your mind, typically requires steam, solvent, or a professional mechanical stripping method, according to BobVila’s technical breakdown. That’s a reasonable trade for a homeowner painting a rental or a room they’ll redo again in a few years. It’s a bigger commitment in a home you plan to keep for the long haul.
Call a professional if you’re dealing with multiple layers of old wallpaper, any sign of mold or persistent damp, heavily textured papers like grasscloth, or a large, high-visibility space like a living room you’re prepping for resale.
What a Painting Contractor Wants You to Know
Getting a wallpapered wall to look like it was never wallpapered at all comes down to two things: how much time you spend on prep, and whether you chose the right primer. Most DIY disappointments trace back to skipping one of those two steps, not to a lack of painting skill.
A professional painting company has extensive experience working with similar situations across various property types, using quality paint and all-inclusive pricing that covers labor, materials, and cleanup with no surprise charges. Typically, each job is assigned a dedicated project manager and offered with a one-year warranty, which is important for wallpaper jobs since problems like seam telegraphing or adhesion failure sometimes don’t show up until weeks after the paint dries.
Where a professional earns their fee is in the harder cases: skim-coating a wall with heavy seams, dustless sanding that keeps a lived-in home livable during the work, and a guaranteed finish on rooms you’re prepping to sell or show. If you’re weighing your own results against what a pro delivers, that gap usually shows up in the seams first.
What Painting Over Wallpaper Actually Comes Down To
The conventional wisdom on this topic treats “can you paint over wallpaper” as a yes-or-no question about the wallpaper itself. It isn’t. It’s a question about how much prep you’re willing to do, because the paper’s condition matters less than whether you clean, reglue, fill, and prime it correctly.
Most guides bury the primer warning halfway through a long article. I’d put it first: an oil- or shellac-based primer is the single decision that determines whether this project succeeds. Get that wrong, and no amount of careful rolling technique saves you.
The trade-off nobody likes to say plainly is that painting over wallpaper is close to a one-way door. You’re not just updating a wall; you’re sealing a layer into your home that will take real effort to remove later. That’s a fine trade for a rental or a short-term fix. It’s worth pausing on if you’re renovating a forever home. Do the spot test, be honest about what it tells you, and don’t force paint onto wallpaper that’s already fighting you.
— Fabian
Want a Guaranteed Finish Without the Guesswork?
If your walls have textured wallpaper, multiple layers, or any hint of damp, or you simply don’t have a weekend to spend sanding and priming, hiring out the job removes the biggest risk in this whole process: finding out too late that the prep wasn’t enough. A professional painting service can handle the surface prep, primer selection, and paint application as one all-inclusive service, often assigning a dedicated project manager to oversee the job from start to cleanup and offering a one-year warranty to back the result.

HDB homeowners can compare options through the HDB painting packages, which range from $600 for a Basic Package up to $2,200 for a Premium finish depending on scope. Condo owners have a parallel set of options starting at $950 through the condo painting packages. If your walls need a dedicated sealing step before color goes on, primer and sealer service is available from $250 per flat. Request a quote and let a project manager walk your space before you decide whether this is a DIY weekend or a job worth handing off.
Where This Guide’s Recommendations Come From
The primer guidance, spot-test method, and long-term removal warning in this guide draw on BobVila’s detailed walkthrough of painting over wallpaper, which lays out why oil- and shellac-based primers outperform water-based options on this surface. Prep sequencing and primer tinting advice come from This Old House’s painting-over-wallpaper guide. Finish selection and when removal beats painting over come from HouseBeautiful and Southern Living, both of which lean on contractor input for their practical recommendations.
Sources
- How to paint over wallpaper | BobVila
- How To Paint Over Wallpaper and Make Your Walls Shine | This Old House
- Can you paint over wallpaper? An expert reveals what to know | HouseBeautiful
- Can You Paint Over Wallpaper? Experts Weigh In | Southern Living
FAQ
Can I Paint Directly Over Wallpaper?
Yes, as long as the wallpaper is smooth, firmly adhered, and free of peeling, bubbling, or moisture damage. Seal it first with an oil- or shellac-based primer, since water-based primers risk reactivating the adhesive underneath.
Can You Paint Over 20-Year-Old Wallpaper?
Age itself isn’t the deciding factor. What matters is whether the adhesive is still holding, the seams are intact, and there’s no water damage behind it, all of which you should confirm with a physical inspection and a spot test before priming.
What Kind of Paint Will Stick to Wallpaper?
Standard latex paint works fine as a topcoat once you’ve sealed the wallpaper with an oil- or shellac-based primer first. Skipping that primer step is the most common reason paint fails to stick or causes bubbling on wallpapered walls.
What Is the Cheapest Way to Cover Up Wallpaper?
Painting over well-adhered wallpaper is typically less expensive than full removal, since it skips the labor and potential wall repair that stripping paper can require. For homeowners who’d rather not handle prep and priming themselves, 5starpainting’s HDB packages start at $600 and include surface prep, primer, and paint in one price.