
Yes, you can paint over oil-based paint, provided the old coat is fully cured and you degloss, clean, and prime it correctly first. Skipping prep is the number one reason repaints peel within months. The safe default workflow is: sand to degloss (180 to 220 grit), clean with a degreaser, apply a bonding primer, then finish with two coats of quality water-based paint, or an oil/alkyd topcoat if you want maximum durability on trim.
TL;DR:
- Ensure the existing oil-based paint is fully cured, hard, and free of peeling or tackiness before attempting to paint over it, to prevent early failure.
- Proper preparation requires sanding with 180-220 grit, cleaning with a degreaser, and applying a bonding primer, ideally tinted toward the final color to reduce coats.
- Use a denatured alcohol test to confirm whether the surface is oil-based paint, avoiding misapplied primer and ensuring proper adhesion.
- Professional-grade results often depend on meticulous surface prep, adhesion testing, and matching primer or finish sheen to surface wear levels.
- Consider hiring a contractor for whole-room or cabinet projects to ensure durability, warranty, and proper process adherence, especially on older or lead-containing surfaces.
Table of Contents
- Quick Pre-Paint Checklist Before You Paint Over Oil Paint
- Materials and Tools You’ll Need
- How Do You Test for Oil-Based Paint?
- Step-by-Step Surface Preparation for Painting Over Oil
- Why You Need a Bonding Primer (and When to Tint It)
- Choosing Your Topcoat: Water-Based vs. Oil/Alkyd
- Common Repaint Failures and How to Fix Them
- What Professionals Do Differently on Oil-Paint Repaints
- When to DIY and When to Call a Painting Contractor
- Let a Professional Crew Handle Your Oil-Paint Repaint
- Sources
Quick Pre-Paint Checklist Before You Paint Over Oil Paint
Before you open a single can, run through this checklist. It takes fifteen minutes and saves you a weekend of redoing work.
- Run the oil test. Wipe a small area with denatured alcohol on a rag. If the finish stays hard and doesn’t soften or transfer color, you’re dealing with oil-based paint and need the full prep workflow below.
- Inspect for soft or peeling spots. Press a fingernail into the surface in a few places. Any give, tackiness, or flaking means the paint isn’t cured or is already failing, and painting over it now will just trap the problem under a new layer.
- Check the age and smell. Oil paint that still carries a solvent smell after weeks is a sign it hasn’t fully cured, even if it looks dry to the touch.
- Gear up properly. Wear a NOSH-rated respirator (not just a dust mask) when sanding old paint, safety glasses, and gloves. Open windows and run a fan to exhaust dust and fumes outward, especially with solvent-based primers.
- Know when to call a contractor. If you’re covering more than a couple of rooms, working with pre-1978 paint that could contain lead, or you want a warranty-backed finish, hiring a professional painting crew usually costs less in the long run than redoing a botched DIY job.
If your checklist raises a red flag on lead paint, stop sanding immediately and get the surface tested before doing anything else.
Materials and Tools You’ll Need
Most of what you need for this job is available at any hardware store, and you likely have some of it already.
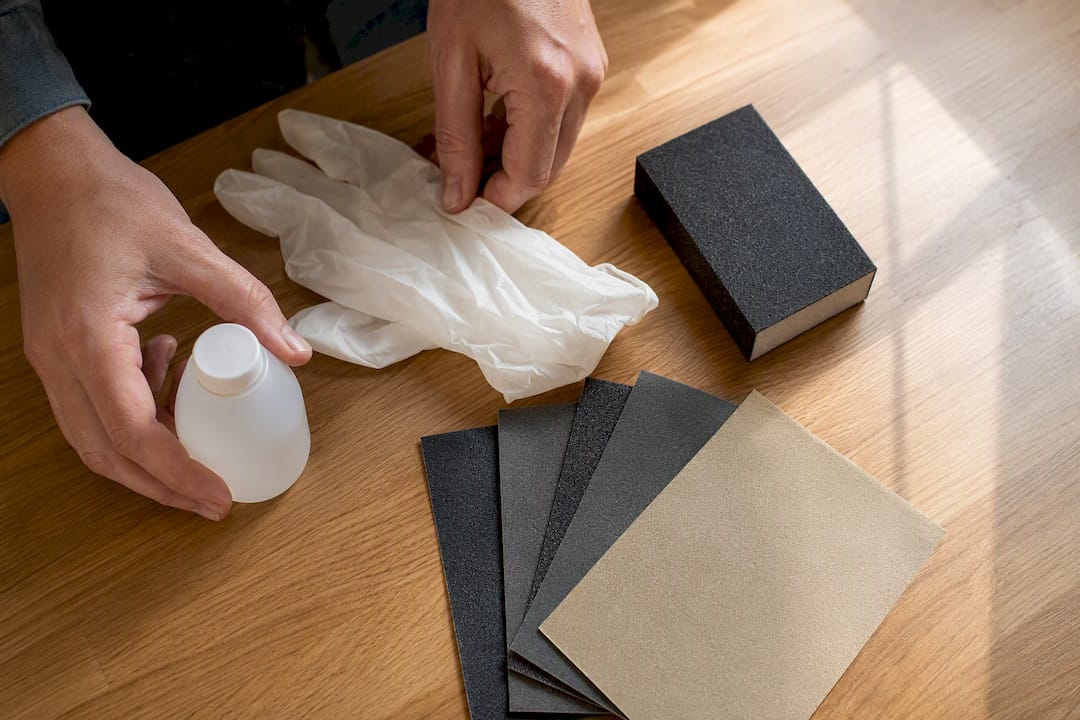
For testing and cleaning:
- Denatured alcohol (for the oil test)
- TSP (trisodium phosphate) or a phosphate-free degreaser, since some municipalities restrict TSP disposal
- Clean rags and a bucket
- A sanding sponge or pole sander for larger wall areas
For sanding:
- 120 to 150 grit sandpaper for knocking down any loose or flaking paint edges
- 180 to 220 grit sandpaper for the actual deglossing pass across sound paint
- A dust mask or respirator rated for fine particulates
For priming and painting:
- A bonding (adhesion) primer for most interior jobs, or an alkyd primer for heavy-wear trim, doors, and cabinetry
- A quality synthetic-bristle brush for trim work and a solvent-resistant roller if you’re using an oil-based product
- Painter’s tape, plastic sheeting, and drop cloths to contain dust and drips
A gallon of primer typically covers a moderate area, and you’ll want roughly the same coverage in topcoat, doubled since you’re applying at least two finish coats.
Pro Tip: Buy a cheap alcohol test kit or just grab a small bottle of denatured alcohol from the paint aisle before your shopping trip. Confirming you’re dealing with oil paint changes which primer and how much sanding gear you actually need to buy.
How Do You Test for Oil-Based Paint?
The denatured alcohol test is the fastest, most reliable way to confirm what you’re working with, and it takes less than five minutes.
- Dampen a clean cloth or cotton ball with denatured alcohol.
- Rub it firmly against a small, inconspicuous section of the painted surface for about 30 seconds.
- Check the cloth and the surface. If color transfers onto the rag or the paint softens and feels tacky, you’re looking at latex or acrylic paint. If nothing happens and the surface stays hard, it’s oil-based.
- Look for visual confirmation too. Oil paint tends to hold a deeper gloss for years, often develops a slight yellow cast over time (especially in low-light rooms like closets or bathrooms), and feels noticeably harder and smoother than latex when you run a fingernail across it.
- Assess cure state. Oil paint can feel dry to the touch within a day but take weeks to fully cure. If it was applied within the last month, give it more time, or proceed with extra caution on adhesion.
- Watch for peeling that indicates deeper failure. If paint is already lifting in sheets or bubbling, that’s not a deglossing problem, it’s an adhesion failure between an existing layer and the substrate, and sanding alone won’t fix it. That situation calls for scraping back to a sound layer or, in stubborn cases, a chemical stripper.
Professional painters report that the single most common repaint failure starts with a wrong assumption. Someone assumes a glossy latex is oil-based paint, or vice versa, and applies the wrong prep for the surface they’ve actually got. The alcohol test removes that guesswork before you spend a weekend on the wrong approach.
Step-by-Step Surface Preparation for Painting Over Oil
This is the part of the job that actually determines whether your new paint stays put for years or peels off in sheets by next summer. Rushing prep to get to the “fun part” of rolling color on the wall is the most common DIY mistake in this entire process.
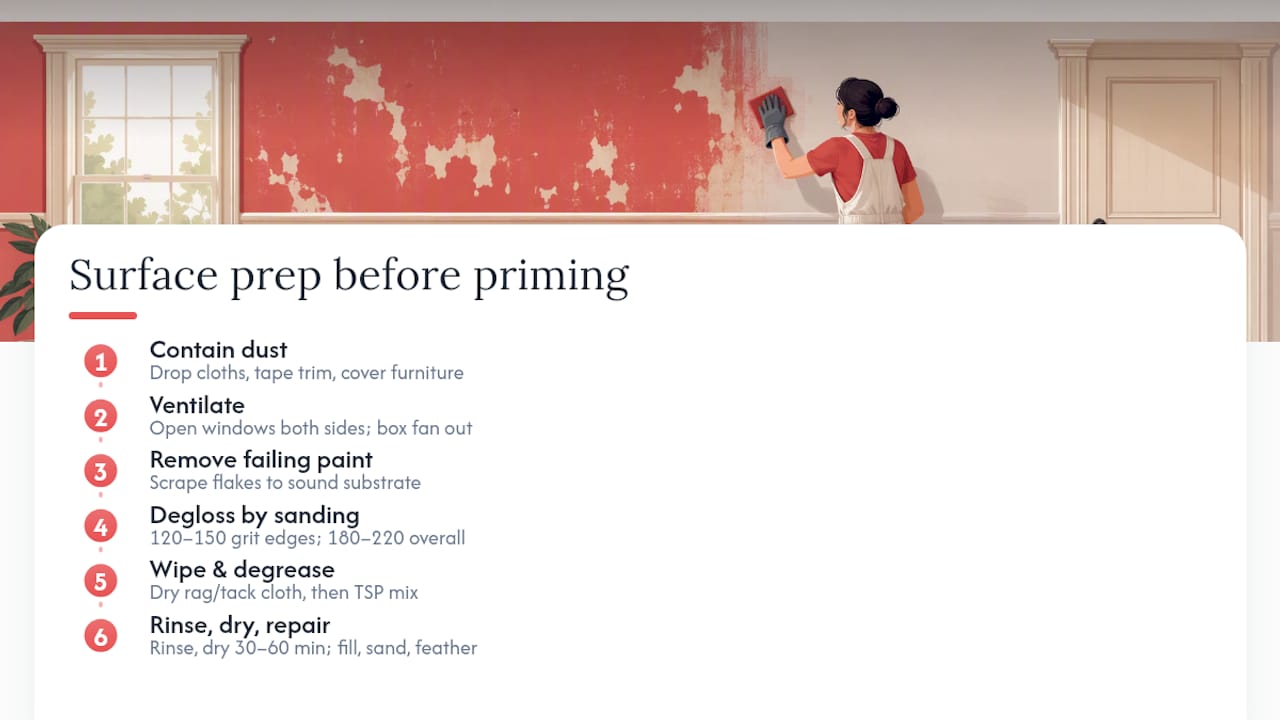
1. Set up containment first. Lay drop cloths across floors, tape off trim you’re not treating, and move furniture out of the room or cover it with plastic. Sanding old paint kicks up fine dust that settles everywhere if you don’t contain it.
2. Ventilate before you start sanding or priming. Open windows on opposite sides of the room if possible to create cross airflow, and run a box fan facing outward in a window to pull dust and fumes out rather than circulating them. This matters even more once you introduce a solvent-based primer,.
3. Scrape or strip any failing paint. If your oil test in the previous section revealed peeling, bubbling, or flaking, remove those sections down to sound substrate with a scraper. Chemical strippers are rarely necessary for a standard repaint and should be reserved for surfaces where multiple layers have failed or where you need to get back to bare wood for refinishing.
4. Sand to degloss, not to strip. This is the step people either skip entirely or way overdo. You’re not trying to remove the old paint, you’re trying to scuff the surface enough that a primer has something to grip onto. Start with 120 to 150 grit only on any rough or uneven edges left from step three. Then switch to 180 to 220 grit and go over the entire surface evenly, working in the direction of the wood grain on trim and doors. The goal is a uniform dull, slightly matte finish where the original gloss has been knocked down everywhere. Sanding to remove sheen rather than stripping to bare substrate is sufficient for adhesion in the vast majority of cases.
5. Wipe down dust before cleaning. Use a dry rag or a tack cloth to pull loose sanding dust off every surface before you introduce any liquid cleaner. Wet-sanding dust into a surface makes cleaning harder, not easier.
6. Clean with a degreaser. Mix TSP according to the label, typically around a half cup per gallon of warm water, or use a phosphate-free substitute if your local regulations restrict TSP disposal down household drains. Wipe the surface thoroughly, paying extra attention to kitchen cabinets, bathroom trim, or anywhere near cooking grease or hand contact, since oil paint surfaces in those areas often carry an invisible film that blocks adhesion even after sanding.
7. Rinse and dry completely. Wipe down with clean water on a separate rag to remove residual cleaner, then let the surface dry fully, usually 30 minutes to an hour depending on humidity, before moving to repairs.
8. Fill, sand, and feather any repairs. Fill nail holes, dents, or gouges with a lightweight spackling compound. Once dry, sand the patch flush with 220 grit, feathering the edges so there’s no visible ridge once primer and paint go on. Wipe away the resulting dust before priming.
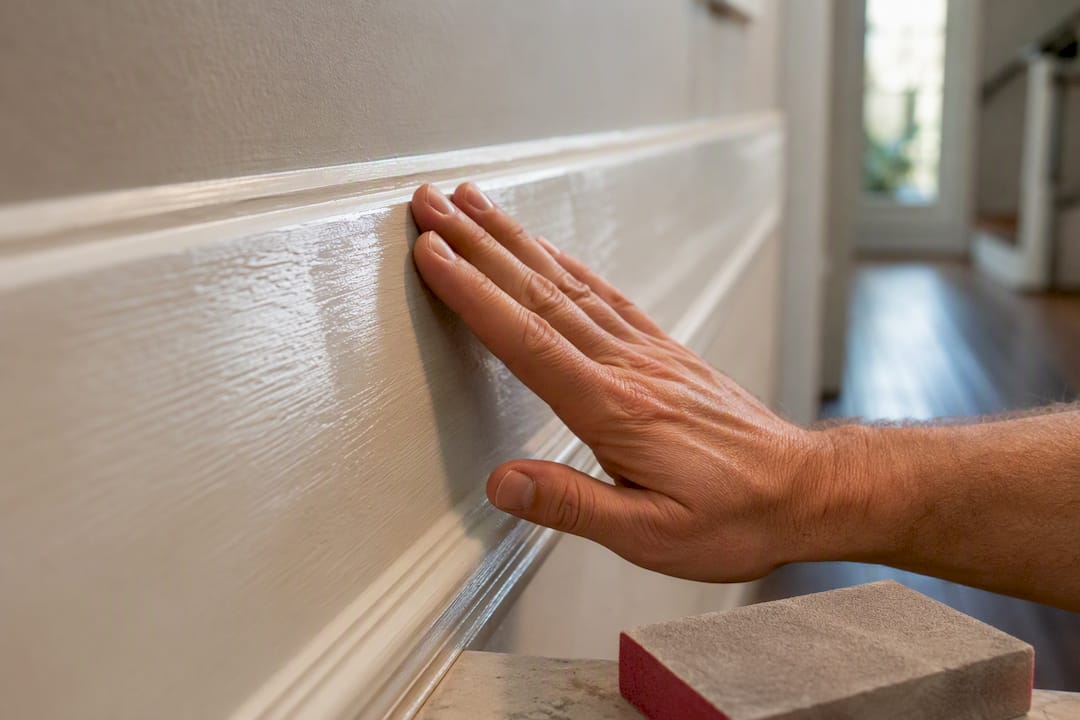
Pro Tip: Run your hand flat across the entire surface after deglossing, with your eyes closed if you have to. Your palm will catch shiny spots and uneven patches your eyes miss under normal room lighting, and those missed spots are exactly where new paint will fail to grip first.
Why You Need a Bonding Primer (and When to Tint It)
A bonding primer is the single most important product decision in this entire project, and it’s the step DIYers skip most often because it feels like an “extra” coat.
Modern water-based paints and old oil-based films don’t naturally bond well on their own, even after a good sanding. A bonding primer acts as a chemical bridge, formulated specifically to grip a slick, cured oil surface on one side while giving your new topcoat something compatible to adhere to on the other. Without it, you’re relying entirely on mechanical adhesion from sanding, which works, but leaves much less margin for error.
When to choose bonding latex primer:
- Interior walls, trim, and doors where low odor and easy cleanup matter
- Rooms with limited ventilation where solvent fumes are a concern
- Most standard residential repaint jobs
When to choose an oil or alkyd primer instead:
- High-traffic trim, banisters, or cabinetry that takes heavy daily wear
- Exterior surfaces exposed to weather cycling
- Situations where you want maximum flow and leveling for a glass-smooth finish
Alkyd primers do perform better on heavy-wear surfaces, but they require stronger ventilation and solvent-safe PPE than their water-based counterparts, including a properly rated respirator, not just a paper dust mask.
Here’s the trick most DIYers never hear about: have your primer tinted toward your final paint color. Most hardware stores will tint a primer for free or for a couple of dollars if you bring in your paint color chip. This single step cuts the number of finish coats you need, particularly noticeable when you’re covering a dark, yellowed, or heavily aged oil surface with a lighter modern color.
Painters who tint bonding primer toward the finish color and follow up with at least two finish coats consistently get more even coverage with less labor than those who skip tinting and hope one extra topcoat will fix a stubborn color mismatch, according to trade guidance on painting over oil paint.
Application notes: Most bonding primers cover 200 to 400 square feet per gallon and dry to the touch in one to four hours, but check the can. Cold or humid rooms slow drying significantly, so keep the space above 50°F and below 70% humidity if you can control it. Let primer dry fully before your first topcoat, rushing this step is how bubbling and poor adhesion sneak back in even after you’ve done everything else right.
If you’re using a primer to lighten or brighten a wall that’s currently dark, the tinting logic works the same way when covering an oil surface, and painting over dark walls with a lighter shade generally.
Choosing Your Topcoat: Water-Based vs. Oil/Alkyd
Once your bonding primer is fully dry, you’ve got two legitimate paths forward, and the right one depends on the surface more than personal preference.
Water-based (latex or acrylic) topcoats work well for the vast majority of interior repaints once you’ve primed correctly. They dry fast, usually recoat-ready in two to four hours, carry far less odor, and clean up with soap and water instead of solvents. They’re the better choice for walls, ceilings, and most trim in rooms without heavy-duty wear.
Oil/alkyd topcoats still earn their place on high-abuse surfaces. They self-level better, meaning brush marks disappear more completely, and they build a noticeably tougher, more scrubbable film. Front doors, stair railings, and kitchen cabinet doors that see constant hand contact are where an alkyd finish tends to outlast latex by a meaningful margin. The tradeoff is longer dry times, stronger odor, and solvent cleanup.
How many coats should you plan for?
- Two finish coats is the realistic minimum for even color and sheen after priming.
- Dark-to-light color changes, or covering yellowed white oil trim, sometimes need a third coat even with a tinted primer.
- Watch for uniform sheen across the whole surface under raked light (light hitting at an angle) as your signal that you’ve got full coverage. Patchy shine in spots means you need another pass.
Application technique by project type:
- Brushing gives you the most control on trim, doors, and cut-in edges around ceilings and windows. A quality synthetic-bristle brush is worth the extra cost here.
- Rolling is faster for flat wall areas and delivers a consistent texture, but always brush the edges first, then roll the field while that cut-in line is still wet to avoid visible seams.
- Spraying delivers the smoothest possible finish on cabinet doors and large trim runs removed from the wall, but it requires masking off everything nearby and proper respiratory protection.
Don’t confuse dry time with cure time. Latex paint feels dry to the touch in one to two hours and is usually recoat-ready in four, but it can take two to four weeks to fully cure to its maximum hardness. That distinction matters for when you rehang hardware, put shelving back, or let kids lean against a freshly painted door. Wait at least a full day before rehanging doors and about a week before subjecting a painted surface to real pressure or friction, longer for alkyd finishes.
If you’re deciding on sheen for trim versus walls, satin generally suits walls while semi-gloss holds up better on trim and doors that see more contact and need to wipe clean easily. Sheen selection is a similar logic to primer selection: the more wear a surface takes, the tougher and glossier the finish should be, a principle echoed in guidance on choosing sheen for interior doors specifically.
Common Repaint Failures and How to Fix Them
Even with careful prep, a few predictable problems show up. Here’s what causes each one and how to correct it without starting the whole job over.
- Peeling shortly after painting. This almost always traces back to skipped deglossing or a contaminated surface, often kitchen grease or bathroom soap film that survived cleaning. Fix it by scraping back to sound paint, resanding the affected area, cleaning again, and reapplying bonding primer before repainting just that section.
- Flash-through or gloss mismatch. Patches that look shinier or duller than the surrounding area usually mean uneven primer coverage or a spot where the old oil gloss wasn’t fully knocked down. A light scuff sand and one more even coat over the entire wall, not just the patch, usually resolves it since spot-fixing sheen rarely blends invisibly.
- Fish-eye (small craters or bare spots in the wet film). This is a contamination issue, typically silicone from furniture polish, caulk, or a cleaning product residue that repels paint. Clean thoroughly with a stronger degreaser, sand lightly, and consider a shellac-based primer on stubborn spots since it seals contaminants better than standard bonding primer.
- Repeated adhesion failure despite proper prep. If peeling keeps recurring even after you’ve reprimed correctly, suspect the substrate itself, meaning the oil paint layer underneath your primer may already have poor adhesion to whatever is under it. That’s a sign to remove more paint layers rather than keep adding new ones on top.
- Suspected lead paint. Any home with paint applied before 1978 could contain lead. If sanding reveals a chalky, layered buildup consistent with old lead paint, stop immediately and consult a certified lead-abatement professional rather than continuing DIY prep.
For a wall or door section that’s already flaking before you even start, a full peeling paint repair workflow will get you back to a stable base before priming.
Pro Tip: Keep a small offcut of the same surface material, extra trim scrap or a spare cabinet door panel, to test your full prep-to-paint sequence before committing to the real thing. Five minutes of testing on scrap catches fish-eye or adhesion problems before they show up on your actual door.
What Professionals Do Differently on Oil-Paint Repaints
Experienced painting crews follow the same core sequence covered above, but a few habits separate a professional-grade finish from an average DIY result.
- Surface prep gets more time than the paint itself. On a typical room repaint starting from oil-painted trim and walls, professional crews often spend more hours on sanding, cleaning, and priming than on the actual finish coats, because that invisible work is what determines whether the job lasts five years or fifty.
- One point of accountability. A dedicated project manager overseeing prep, primer selection, and quality checks catches problems, like a missed deglossing spot or a contaminated section, before they become a finish-coat failure.
- Adhesion checks before the final coat. Crews often do a quick tape-pull test on a treated section, pressing painter’s tape onto the primed surface and pulling it off, to confirm the primer has properly gripped before committing to finish coats across an entire room.
- Sheen uniformity checks under raked light. Walking the room with a work light held at a low angle reveals patchy sheen invisible under normal overhead lighting, catching gloss mismatches before the client ever sees them.
- A final walk-through against the original scope. Comparing the finished job to what was quoted, including trim, doors, and touch-up areas, catches missed spots before cleanup and furniture return.
- Alkyd topcoats on the surfaces that earn it. Pros tend to reserve oil/alkyd finishes for cabinetry, high-traffic doors, and railings, where the tougher film justifies the longer cure time, while defaulting to water-based paint everywhere else for speed and lower odor.
When to DIY and When to Call a Painting Contractor
A single door, a run of trim, or one small closet with oil-painted shelving is a reasonable DIY project if you’ve got a weekend and patience for the sanding and priming steps most people rush. The workflow above will get you a durable result on a limited scope.
Where I’d draw the line is anything involving full rooms of oil-painted walls, kitchen cabinetry, or a home old enough to raise lead concerns. Cabinetry in particular punishes shortcuts. Every door and drawer front needs the same careful degloss, prime, and cure sequence, and one missed spot shows up as a peeling corner within weeks of daily use. Multiply that across twenty cabinet doors and the margin for error shrinks fast.
Hiring a professional crew isn’t just about saving your own weekend. It buys you a warranty on the finish, a crew that’s done this exact sequence hundreds of times, and someone accountable if a section fails prematurely. For a full room or a whole home, that accountability tends to save more money in avoided rework than the labor cost of doing it yourself and getting it wrong once.
— Fabian
Let a Professional Crew Handle Your Oil-Paint Repaint
If everything above sounds like more sanding, testing, and priming than you want to take on, that’s exactly the gap professional painting crews available for homeowners in residential properties. Every job starts with the same surface-prep-first approach covered in this guide, done by a crew that’s handled oil-to-latex transitions on hundreds of homes, using quality paint products and offering a warranty on the finish.

The pricing covers labor, furniture protection, and cleanup, and a project manager is assigned to jobs to oversee progress. That means no guessing whether the primer coat was tinted correctly or whether the deglossing pass actually caught every glossy trim edge, someone else is checking that for you.
If you’re weighing whether to spend a weekend sanding cabinet doors or hand the whole project off, request a free quote through the main service page and get a realistic scope and price before you commit either way. HDB owners can also check package details directly on the HDB painting services page for an all-inclusive estimate starting point.
Sources
For readers who want manufacturer specs, safety data sheets, or deeper technical background beyond this guide, these sources cover the material chemistry and product-level detail in more depth:
- Painting Over Oil-Based Paint? Rules to Remember – Bob Vila
- Tips on Painting Over Oil-Based Paint – BEHR