
Most hairline cracks in walls are cosmetic, not structural, and you can make them disappear yourself. The repair follows one dependable sequence: widen the crack slightly, clean it out, pack it with flexible filler, let it dry, sand it smooth, prime, and repaint to match. The main exception is a crack wider than about 1/4 inch, one that keeps growing, or one paired with sticking doors or moisture stains. Those need a contractor, not a caulking gun.
TL;DR:
- Hairline cracks less than 1/16 inch wide usually do not reappear after proper filling, while cracks wider than 1/4 inch often indicate a need for professional assessment.
- Using flexible, paintable filler and proper surface preparation significantly improves the durability and invisibility of DIY wall crack repairs.
- Repeated crack widening, sticking doors, or moisture stains signal underlying issues that require a contractor, not just caulking and repainting.
- Applying primer before painting over repaired cracks is crucial to prevent patch lines from showing through top coats.
- For multiple or persistent cracks, hiring a professional offers better long-term results with proper surface prep, quality materials, and a warranty.
Table of Contents
- Tools and Materials for Hairline Crack Repair Walls Projects
- Step-by-Step: How to Repair Wall Cracks the Right Way
- Choosing the Right Filler, Sealant, and Primer
- When Should You Hire a Professional Instead?
- Preventing Cracks From Coming Back
- A Painter’s Perspective on Lasting Repairs
- Get a Professional Fix Without the Guesswork
- Sources
- FAQ
Tools and Materials for Hairline Crack Repair Walls Projects
Before you touch the wall, lay out everything within reach. Stopping mid-repair to run to the hardware store almost always shows up in the final finish, because you end up rushing the last coat.
Here’s what to gather:
- A utility knife and a scraper for opening and cleaning the crack
- A small filling knife or trowel for applying filler
- Sandpaper in 220 to 240 grit, plus a dust mask
- A flexible crack filler (caulk-style tubes work well for fine, hairline-width cracks)
- A fine surface filler or joint compound for the final smoothing pass
- Primer suited to your wall substrate (plaster, drywall, or previously painted surface)
- Matching paint, plus a brush and small roller for blending
A few optional extras make a real difference on tricky spots. Mesh tape helps on recurring cracks at drywall seams, a backer rod fills deep gaps before you apply sealant, and a proper caulking gun gives you far more control than squeezing a tube by hand.
Step-by-Step: How to Repair Wall Cracks the Right Way
Confirm what you’re dealing with first. A true hairline crack measures less than about 1/16 inch wide, runs in a fairly straight or slightly jagged line, and doesn’t reappear a few weeks after painting over it. If it’s wider, branching, or growing, stop and jump to the hiring section below.
Once you’ve confirmed it’s cosmetic, work through these steps:
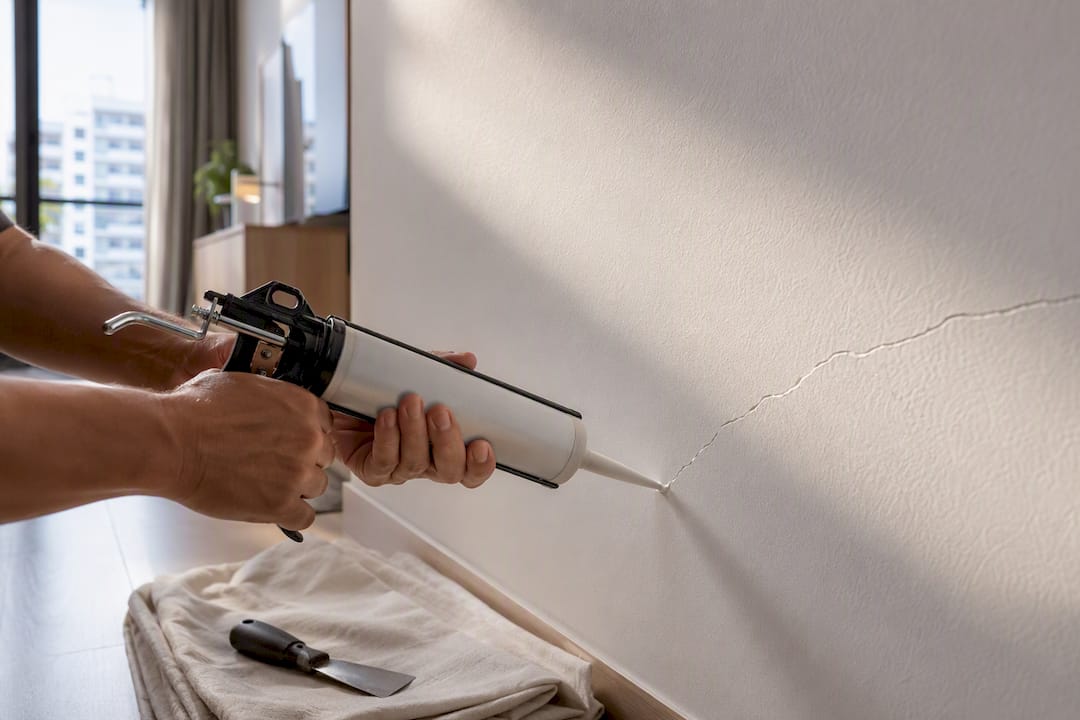
- Widen the crack slightly. Use a utility knife to cut a shallow V-groove along the crack, just a couple of millimeters deep. This isn’t about making the damage look worse. It gives the filler something to grip instead of sitting on a flat surface where it will pop out later, a technique widely recommended in step-by-step wall crack repair guides.
- Clean it out. Brush or vacuum out dust and loose paint chips, then wipe the area and let it dry fully. Filler applied over dust never bonds properly.
- Fill it. Push the flexible filler deep into the groove rather than skimming it across the surface. For cracks deeper than a hairline, manufacturer instructions for products like DRYLOK’s masonry crack filler recommend backing the gap before the final fill so the compound has something to bond against instead of just sinking in.
- Let it dry. Most flexible fillers need 24 hours before sanding, though thicker applications can take longer. Check the product label. Rushing this step is the single most common reason a “fixed” crack reappears within a season.
- Sand and finish. Once dry, sand lightly with 220 to 240 grit until the patch sits flush with the surrounding wall. If you see a slight dip, apply a thin skim of fine surface filler, let it dry, and sand again.
- Prime, then paint. Prime the patch before repainting. Skipping primer is exactly why so many DIY patches show through as a slightly different sheen or texture, even after two coats of paint.
Pro Tip: Paint the entire wall panel rather than just the patch. Spot-painting almost always leaves a visible rectangle once the light hits it at an angle, even with a perfectly color-matched can.
A single isolated crack is realistically an afternoon job once you count drying time, which lines up with what most DIY repair walkthroughs report for straightforward jobs.
Choosing the Right Filler, Sealant, and Primer
Not every crack calls for the same product, and picking the wrong one is why some repairs crack open again within months.
Flexible versus rigid filler. Flexible, paintable, interior-rated fillers are the right call for almost every hairline crack, because walls expand and contract slightly with temperature and humidity. A rigid filler can’t move with the wall and tends to crack right back along the same line. Look for “flexible” and “paintable” on the label before you buy.
Caulk-style sealant versus spackling compound. Caulk-style sealants, dispensed from a cartridge with a caulking gun, are better for fine, continuous hairline cracks because you can lay down a controlled bead. Spackling or joint compound works better for slightly wider gouges or nail holes where you’re building up material with a knife rather than piping it in.
Primer and sheen. Match your primer to the substrate. Plaster and drywall often need different formulations, and using the wrong one is a common reason patches telegraph through the topcoat. A flat or matte topcoat hides patch lines far better than a satin or gloss finish, which reflects light unevenly across any texture difference.
Application conditions. Flexible polymer sealants have a specified temperature and humidity window for proper curing, according to product data sheets for advanced polymer crack sealants. Applying filler in a cold, damp room slows curing and weakens adhesion, so check the label before you start.
When Should You Hire a Professional Instead?
Some cracks are a weekend project. Others are a warning sign, and filling them cosmetically just hides a problem that keeps getting worse underneath.
Call a contractor if you notice:
- A crack wider than roughly 1/4 inch, or one that’s visibly widening over a few weeks
- Multiple new cracks appearing in the same room around the same time
- Doors or windows nearby that have started sticking or binding
- Moisture stains, discoloration, or a musty smell near the crack
HDB’s own guidance on wall cracks draws this same line: flexible sealant and repainting for hairline cracks, a contractor for anything wider or structural in nature.
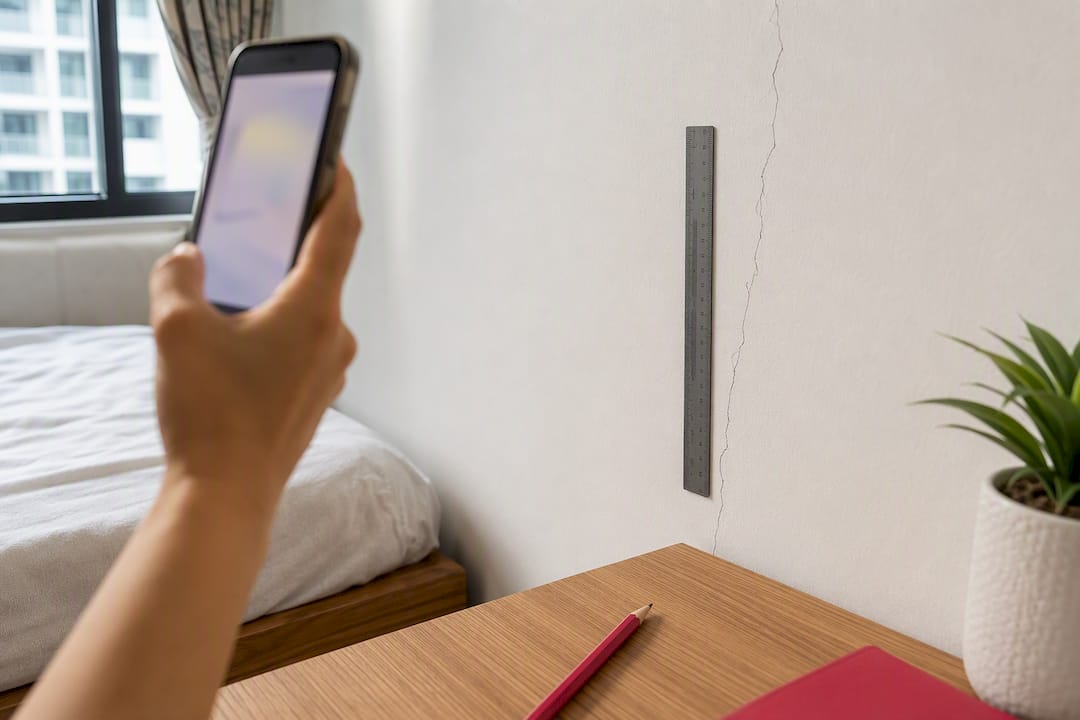
Before the visit, document everything. Photograph the crack next to a ruler, note the date, and take a follow-up photo two weeks later to show whether it’s changing. When you speak with a painter or repair contractor, ask about their surface prep process, whether they offer a warranty, which paint brand they use, and whether you’ll have a single project manager for the job. If you’re gathering quotes, a platform like BidWolf lets you compare sealed contractor bids side by side. And if there’s any hint of moisture behind the crack, that’s a job for a waterproofing or structural specialist first, cosmetic filler second.
Preventing Cracks From Coming Back
A repaired crack that reappears in six months usually points to an unaddressed cause, not a bad filler job.
- Keep indoor humidity relatively stable and avoid sudden temperature swings, which stress plaster and drywall joints.
- Fix leaks before you fix the wall. Cosmetic patching over an active leak will fail, so check plumbing lines and roof areas near any crack with staining, and a partner resource like this guide on locating wall leaks can help you narrow down the source.
- Repaint on a regular cycle, and use a flexible topcoat in rooms prone to movement, like near windows or above doorframes.
- Do a quick visual check every few months for new hairline cracks, catching them while they’re still a five-minute fix.
Pro Tip: If a crack keeps reopening at the same drywall seam, reinforce it with self-adhesive mesh tape under the joint compound before your next repaint. Filler alone rarely holds up against a seam that keeps moving.
A Painter’s Perspective on Lasting Repairs
Homeowners often treat a hairline crack as a five-minute cosmetic fix, and for a single isolated crack, it usually is. Where people go wrong is skipping primer or reusing rigid filler because it’s what’s already in the garage. Those shortcuts are why the same crack often comes back within a year.
What actually separates a repair that lasts from one that doesn’t is prep, not the brand of paint you finish with. That’s the same principle behind a professional painting service’s approach on every job: proper surface preparation, a dedicated project manager overseeing the work, and genuine paint applied under an all-inclusive quote with no hidden add-ons. For a DIY patch on one wall, your own hands are enough. For a full room or a recurring problem, a properly managed job tends to outlast a rushed one.
— Fabian
Get a Professional Fix Without the Guesswork
If your walls have more than one stubborn crack, or you’d rather not spend a Saturday sanding and color-matching paint, a professional painting service can handle the whole job with an all-inclusive fixed price covering labor, genuine paint, furniture protection, and cleanup, so there’s no surprise invoice waiting at the end.

DIY works well for a single, isolated hairline crack you can reach easily and finish in an afternoon. It makes less sense when you’re dealing with several cracks across a room, a wall that’s due for a full repaint anyway, or a finish you need to be genuinely invisible, not just close. Every 5starpainting job comes with a dedicated project manager overseeing surface prep, crack patching, priming, painting, and a one-year warranty on the finished work. If you own an HDB flat, check HDB painting services starting from $600. Condo owners can look at condo painting packages starting from $950. Either way, you can request a quote and get a firm price before any work begins.
Sources
The guidance in this article draws on official housing authority advice and manufacturer application instructions, not general opinion.
- Fixing Wall Cracks in HDB Flats
- Wall Crack Repair: Causes & Step-by-Step Instructions
- Advanced Polymer Concrete Crack Sealant (data sheet)
FAQ
How do you fix a hairline crack in a wall?
Widen the crack slightly with a utility knife, clean out dust, pack it with a flexible filler, let it dry fully, sand smooth, then prime and repaint the wall panel to blend the finish.
How do you fix hairline cracks in painted walls?
Follow the same sequence as an unpainted wall, but scrape away any loose or flaking paint around the crack first so the filler bonds to solid material, then prime before repainting.
Can I just paint over hairline cracks?
No. Paint alone flexes over the gap temporarily but rarely holds, and the crack typically reappears within a few months without filler and primer underneath it.
Is it normal to have hairline cracks in walls?
Yes. Minor settling, temperature changes, and normal building movement cause hairline cracks in most homes, and they’re rarely a sign of structural trouble unless they widen or multiply.
When should I hire a painting contractor instead of doing it myself?
Call a professional if a crack exceeds about 1/4 inch, keeps growing, appears alongside sticking doors or moisture stains, or if you’re facing several cracks across a room that’s due for a full repaint.