
Use a high-hide, tinted primer first, then apply two finish coats. That’s the fastest, most reliable path from a dark wall to a light, even finish. For most rooms, a medium-gray tinted primer plus two coats of quality paint gets you there without streaking or bleed-through.
Here’s what to line up before you open a can:
- A high-hide or stain-blocking primer, tinted toward medium gray
- Quality interior paint with strong hiding power
- Coverage math based on roughly a typical coverage rate per liter per coat
Statistic to remember: primer manufacturers and paint retailers agree that primer is essential for dark-to-light transitions, and colors like black, navy, and forest green sometimes need a third topcoat even after priming. Skip that step and you’re setting yourself up for extra work, not less.
Your next move: head to the paint counter, ask for a high-hide primer tinted medium gray, and grab basic prep supplies. If the job feels bigger than a weekend, 5starpainting handles the whole process professionally.
Key Takeaways
Covering dark walls successfully comes down to primer choice, tinting strategy, and correct application technique, not luck or extra paint cans.
| Point | Details |
|---|---|
| Prime before painting | A high-hide, tinted primer prevents bleed-through and cuts finish coats needed. |
| Tint primer gray | Mixing primer toward medium gray bridges dark and light colors, often halving coat count. |
| Budget for stubborn colors | Black, navy, burgundy, and forest green may need a third finish coat even after priming. |
| Use coverage math | Estimate materials using the standard rate of about a typical coverage rate per liter per coat. |
| Hire for guaranteed results | 5starpainting offers full prep, genuine Nippon Paint application, and a one-year warranty starting around $600 for HDB flats. |
Table of Contents
- Tools and Materials for Covering Dark Paint With Light
- How Do You Prep a Dark Wall Before Priming?
- What’s the Best Primer for Dark Walls?
- How Do You Apply Finish Paint Over Primed Dark Walls?
- Can You Paint Over Dark Walls Without Primer?
- How Many Coats Does It Take to Cover Dark Paint?
- How Do You Fix Bleed-Through or Streaking After Painting?
- Expert Tips That Make the Job Go Faster
- What Does It Cost to Paint Over Dark Walls?
- When Should You DIY vs Hire a Painter?
- Get a Professional Finish Without the Guesswork
- Where to Learn More About Paint Coverage and Technique
- Sources
Tools and Materials for Covering Dark Paint With Light
Before you touch a wall, gather the right supplies. Skimping here is the number one reason DIY dark-to-light jobs go sideways.
- Angled sash brush for cutting in around trim and ceilings
- 9-inch roller frame with a nap cover matched to your wall texture (3/8 inch for smooth drywall, up to 3/4 inch for textured surfaces)
- Roller tray, painter’s tape, and drop cloths to protect floors and trim
- Spackle and fine-grit sandpaper for patching holes and dings
On primer: a high-hide primer works for most moderately dark walls, a stain-blocking primer handles smoke damage or water stains, and a tinted primer (mixed toward medium gray) bridges the gap between dark and light most efficiently. For the finish coat, choose a premium interior paint. Flatter sheens hide imperfections and old color better than satin or semi-gloss. Tell the paint counter you’re covering dark walls, and ask them to tint the primer toward your final color.
How Do You Prep a Dark Wall Before Priming?
Preparation determines whether your primer actually sticks and hides evenly. Rush this step and no amount of paint will fix it later.
- Clean the walls. Wipe down every surface with a mild detergent or sugar soap solution, then let the walls dry completely. Grease and dust block adhesion, and a still-damp wall will show through your primer unevenly. This step alone solves more finish problems than any product on the shelf, and it’s worth reviewing proper cleaning technique before you start.
- Repair damage. Fill holes, dents, and cracks with spackle, let it cure, then sand smooth. Wipe away all sanding dust with a slightly damp cloth.
- Scuff glossy surfaces. If the old paint has any sheen, a light pass with fine sandpaper gives the primer something to grip.
- Mask and protect. Tape off trim and window frames, pull outlet covers, and lay drop cloths across floors and furniture.
Pro Tip: Check your prep work in daylight, not just under a ceiling light. Artificial lighting hides dust, drips, and uneven patches that become obvious once the sun hits the wall.
What’s the Best Primer for Dark Walls?
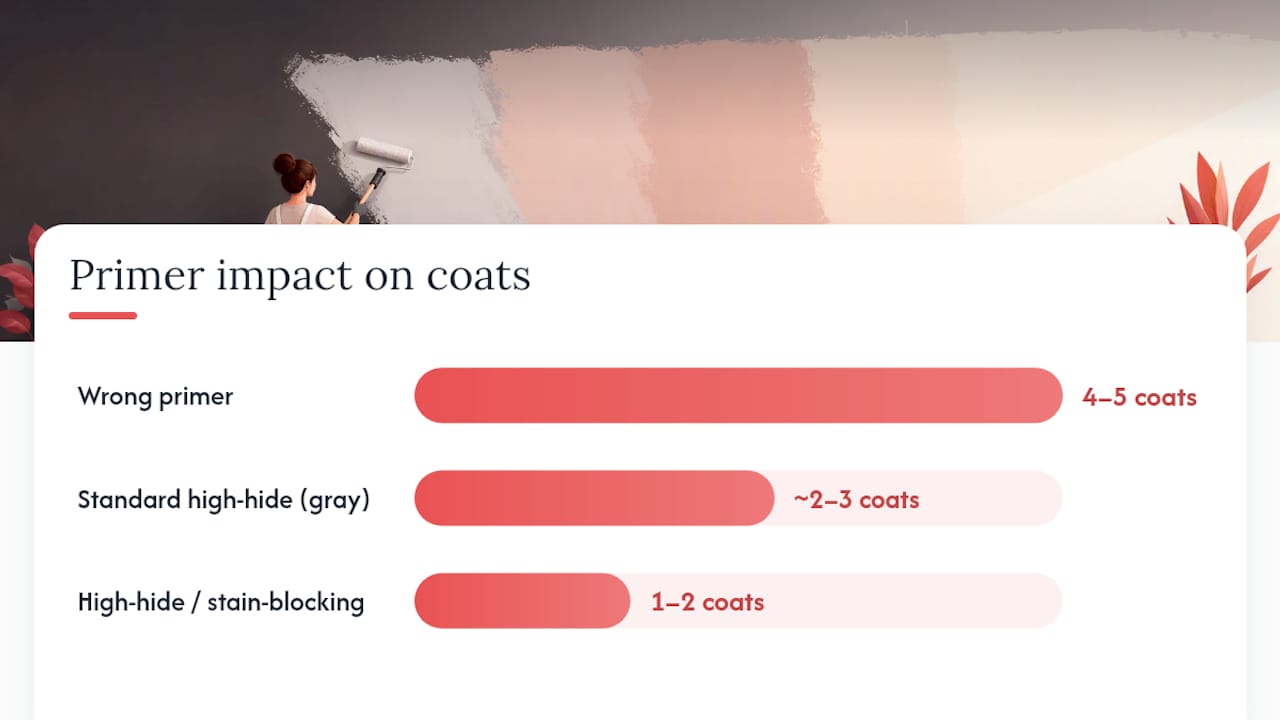
Primer choice is the single decision that determines how many finish coats you’ll need. Get it wrong and you’re rolling on paint four or five times to fight through a stubborn dark color.
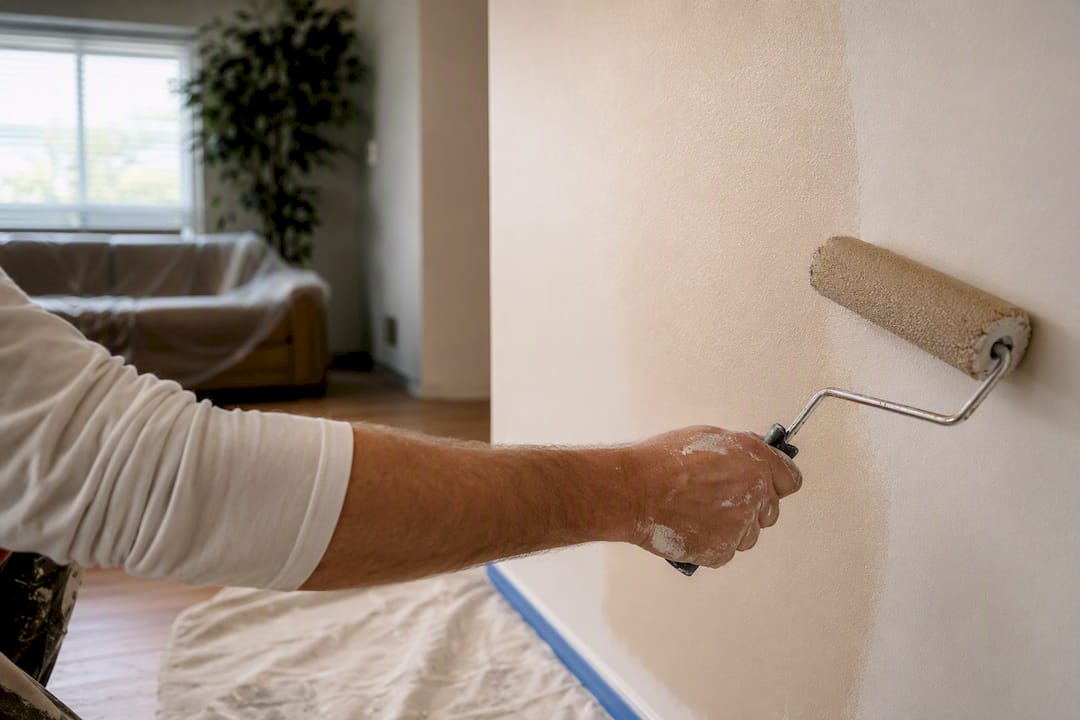
For deeply saturated colors, reach for a high-hide or stain-blocking primer. For anything lighter than true black or navy, a standard high-hide primer tinted toward medium gray usually does the job. That gray tint matters more than most DIYers realize: instead of jumping straight from black to white, you’re bridging the gap in two smaller steps, which cuts the number of finish coats roughly in half in most cases.
To apply primer correctly:
- Cut in around trim, corners, and ceiling lines with your angled brush.
- Roll full sections using a W or M pattern to distribute paint evenly.
- Lay off with light, unloaded roller passes to smooth out texture.
- Let the primer dry fully per the label before judging coverage or adding a second coat.
If the dark color still shows through after the first coat, apply a second (or even third) primer coat before moving to finish paint. This is genuinely cheaper and faster than trying to fix the problem with extra coats of finish paint later, since primer typically resolves persistent bleed-through more efficiently than repeated topcoats.
Use the coverage rate printed on the can, generally around a typical coverage rate per liter, to calculate how much primer to buy. Spreading it too thin to stretch the can is the most common reason people end up needing a third coat.
How Do You Apply Finish Paint Over Primed Dark Walls?
Once your primer is fully dry, the finish coats are where the transformation actually happens. Technique matters as much as product here.
- Cut in first. Work around trim, ceilings, and corners with your angled brush, keeping a wet edge so brush marks blend into the rolled sections.
- Roll in manageable sections. Work 3×3 to 4×4 foot areas using a W or M pattern, then fill in the gaps before the edges start to dry.
- Lay off vertically. Finish each section with light, top-to-bottom passes using a nearly unloaded roller to eliminate texture and lap marks, a technique painters rely on to level out roller stipple.
- Choose your roller nap for the surface, and skip microfiber sleeves for this kind of work. They tend to reabsorb paint rather than release it, which hurts hiding power exactly when you need it most.
- Apply full film thickness. Don’t thin your paint to stretch coverage. That’s a shortcut that guarantees you’ll need an extra coat.
Pro Tip: Inspect finished walls in natural daylight, not lamp light. Thin spots and faint shadowing from the old color are far easier to spot in sunlight, and far easier to fix while your gear is still out.
Can You Paint Over Dark Walls Without Primer?
Skipping primer is a gamble that rarely pays off. Without it, you’re relying entirely on your finish paint to fight through the old color, and that usually means more coats, not fewer.
- Some “paint and primer in one” products can handle mildly darker shades in a single system.
- They won’t reliably cover deep navy, black, burgundy, or forest green. Those pigments bleed through almost every time.
- If you skip primer anyway, budget for three to four finish coats instead of two.
Pro Tip: If you’re on the fence, prime. An hour spent priming saves you two extra rounds of rolling, drying, and re-inspecting later.
How Many Coats Does It Take to Cover Dark Paint?
For most dark-to-light repaints, plan on one to two tinted primer coats followed by two finish coats. That sequence handles the vast majority of jobs efficiently.
- Stubborn colors like black, deep navy, burgundy, and forest green sometimes need a third finish coat even after solid priming, a pattern paint manufacturers flag consistently with these specific pigments.
- Coverage math matters. Using the standard rate of about a typical coverage rate per liter, you can calculate exactly how much paint and primer to buy. Applying it too thin is the single biggest reason people end up buying a third can they didn’t plan for.
- Timeline for a typical room: an empty room can be primed and topcoated over a single weekend, with full drying time between each coat. Expect 24 to 48 hours before furniture goes back in, depending on humidity and paint type.
How Do You Fix Bleed-Through or Streaking After Painting?
Even careful work sometimes leaves visible flaws. Most are fixable without repainting the entire wall.
- Dark color still showing through? Add another coat of tinted primer over the problem area, not another coat of expensive finish paint. Primer is built to block color; finish paint isn’t.
- Lap marks? Sand lightly once fully dry, feather the edges so there’s no hard line, then reapply a thin, local coat.
- Visible streaks or roller texture? Use an unloaded roller for a lay-off pass, and if the paint is still workable, re-roll it while it’s wet rather than waiting.
Pro Tip: Check problem spots in natural daylight before deciding your fix worked. Artificial light flattens shadows that reveal thin patches.
Call a professional if you’re dealing with large-scale pigment bleed-through, heavily textured substrates, multiple wall types in one space, or if you want a guaranteed color match backed by a warranty.
Expert Tips That Make the Job Go Faster
A few habits separate a clean two-coat job from a frustrating four-coat slog.
- Lay off every rolled section with an unloaded roller, working top to bottom with light pressure, to level the paint and erase texture.
- Tint your primer to medium gray between the old dark color and your new light shade. It’s the single fastest way to cut your total coat count.
- Measure using the coverage rate on the can and buy slightly above your calculated estimate. Running short mid-job and applying a thin patch coat is how uneven finishes happen.
- Professional crews like 5 Star Painting lean on full surface prep, genuine Nippon Paint products, and a one-year warranty, which is the same discipline that makes DIY jobs succeed when applied consistently.
What Does It Cost to Paint Over Dark Walls?
Material costs for a standard bedroom or living room typically run from primer, paint, brushes, rollers, tape, and drop cloths, with primer and paint as the largest line items since dark-to-light jobs often need more product than a same-tone repaint. Buying quality high-hide primer and premium paint upfront costs more per can, but it saves you from buying a third or fourth can of finish paint to compensate for weak hiding power.
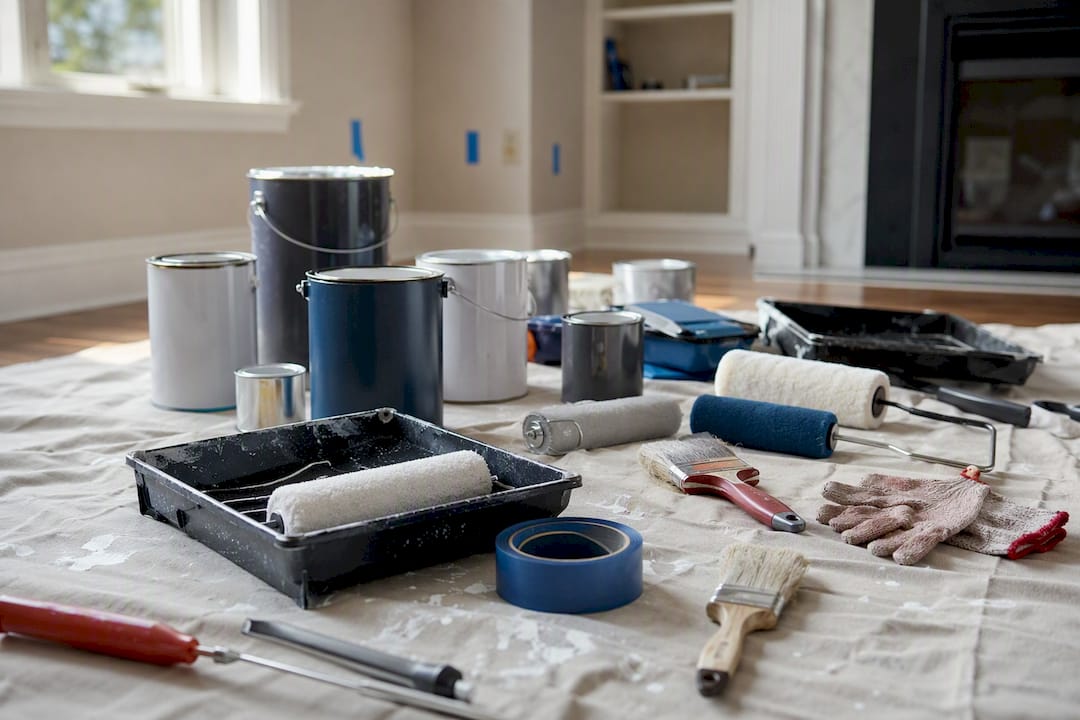
If your walls have textured surfaces, water stains, or smoke residue, factor in stain-blocking primer or specialized cleaning products, since untreated residue can bleed through even a good primer. For stubborn odor or nicotine staining specifically, a dedicated remediation approach before priming prevents the stain from reappearing weeks later.
Hiring a professional shifts the cost structure entirely. You’re paying for labor, project management, and a warranty rather than just materials, but you’re also eliminating the risk of buying extra cans, redoing uneven sections, or discovering bleed-through after the furniture’s already back in place. For an HDB flat in Singapore, professional painting packages typically start around $600 all-inclusive, covering labor, genuine paint, and cleanup. Condo units, being larger, typically start around $950 all-inclusive.
The math worth doing before you decide: add up your material costs, then honestly estimate the hours the prep and multiple coats will take you. For many homeowners, that comparison is what tips the decision toward hiring out.
When Should You DIY vs Hire a Painter?
If your room has flat drywall and a standard layout, DIY is entirely doable with the right primer and technique. Reach for a professional when you’re dealing with textured walls, tricky access points, or you simply want a warranty backing the work.
Get a Professional Finish Without the Guesswork
If the prep, priming, and multi-coat math above sounds like more weekend than you have available, 5starpainting handles the entire process for you, from surface repair through final cleanup, using genuine Nippon Paint products for a finish that won’t show the old color months later.

Every job includes full surface prep, hole patching, precise color matching, and post-job cleanup, backed by a one-year warranty so you’re not troubleshooting bleed-through six months down the line. That warranty matters most on exactly the jobs this article covers: deep, saturated colors that are unpredictable even for careful DIYers. Instead of estimating coats and buying extra cans as a safety margin, you get a fixed, all-inclusive price upfront with no hidden costs for materials or labor.
If you’re ready to skip the trial and error, request a free quote or inspection and get a clear price before any paint goes on the wall.
Where to Learn More About Paint Coverage and Technique
- Check manufacturer how-to guides from Resene, Crown Paints, Dulux, and Lowe’s for product-specific coverage and drying times.
- Always read the coverage rate and drying guidance printed directly on your paint can label.
Sources
- How to paint over dark interior walls – MasterStroke by Resene
- Painting over dark walls | Crown Paints
- How To Paint Over Darker Colours – Bunnings Australia
- Pro Tips for Painting Over a Dark or Light Wall – KILZ®
One Response