
Most professional interior painters will move light-to-medium furniture for you, usually by shifting chairs, coffee tables, end tables, and small bookcases into the room’s center and covering them before work begins. Contractors recommend emptying the room entirely if possible, as this speeds work and reduces risk; when that’s not feasible, manageable items are clustered in the center and fully covered, while heavy, fragile, or oversized pieces — pianos, wall units, antique armoires — remain the homeowner’s responsibility. Here is what that looks like in practice:
- Light furniture included: Most crews handle chairs, side tables, small bookshelves, and ottomans as part of standard prep.
- Heavy or fragile items excluded: Pianos, full wall units, beds with headboards, and mounted TVs are generally outside a painter’s scope.
- Moving as an add-on: Some contractors offer furniture relocation as a quoted extra; others expect the room cleared before they arrive.
Confirm the exact scope and any associated fees with your contractor before work starts. What one crew includes in the base price, another bills separately.
Key Takeaways
Most professional painters move light-to-medium furniture as part of standard prep, but heavy, fragile, or specialty items remain the homeowner’s responsibility, and scope should always be confirmed in writing before work begins.
| Point | Details |
|---|---|
| Light furniture is usually moved | Chairs, end tables, and small bookcases are typically shifted to the room’s center and covered. However, emptying the room entirely, when possible, produces the best results and minimizes risks; if not, clustering manageable items in the center and covering them is standard. |
| Heavy items need separate planning | Pianos, wall units, and antiques require specialist movers or must be worked around with masking film. |
| Confirm costs in writing | Moving fees vary by contractor; always request an itemized estimate before the crew arrives. |
| Layer protection materials | Plastic as a waterproof base, canvas or rosin paper on top for traction, with seams taped and overlapped. |
| Wait before moving furniture back | Allow at least 24 hours for latex paint and 48–72 hours for oil-based paint before returning furniture. |
| 5starpainting includes protection | 5starpainting’s all-inclusive packages cover furniture protection and cleanup with no hidden fees. |
Table of Contents
- Do painters move furniture, and what exactly will they handle?
- Do painters charge extra to move furniture?
- How professional painters protect furniture and floors
- What you should do before painters arrive
- What to do with large, heavy, or delicate items
- When is it safe to move furniture back after painting?
- Key questions to ask your painter about furniture and protection
- A deeper look at protection materials, layering, and taping
- What most homeowners get wrong about furniture and painting prep
- Full-service painting that handles furniture protection for you
- Sources
Do painters move furniture, and what exactly will they handle?
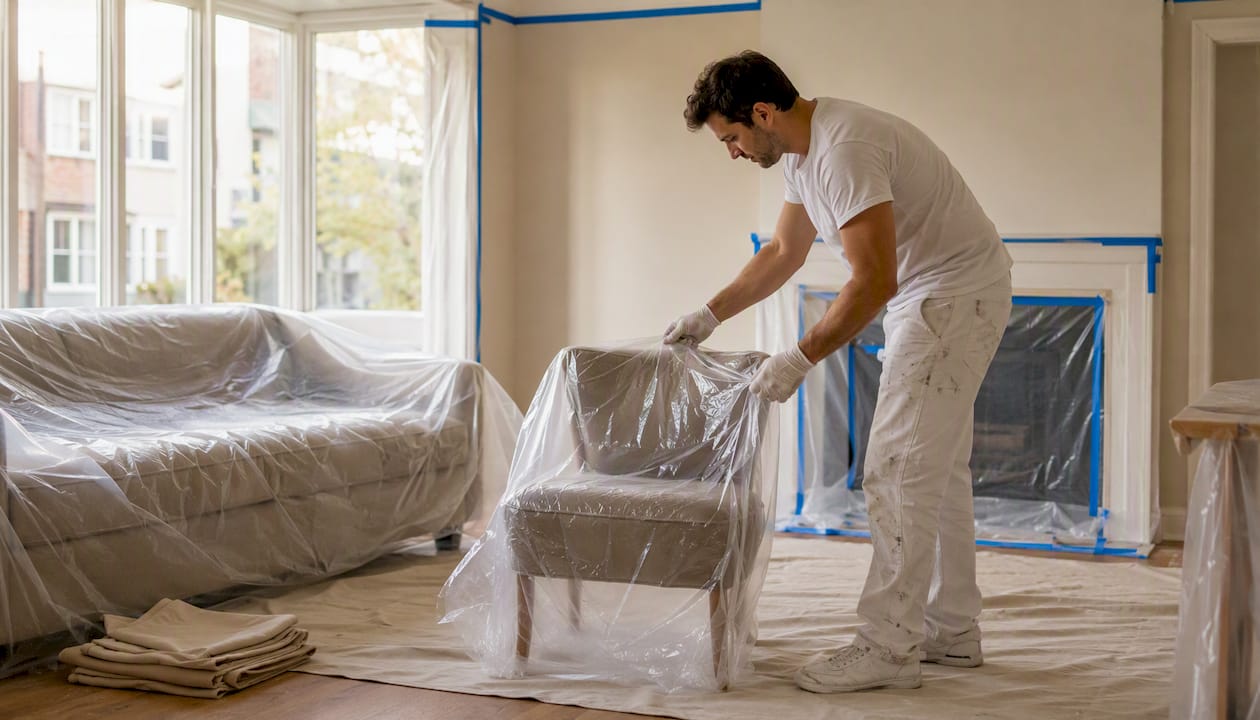
Professional painters move furniture primarily to gain clean wall access and to protect your belongings from roller mist and drips. An empty room is the fastest and safest scenario; when that is not possible, crews move manageable pieces to the center and cover them completely.
Items painters commonly move:
- Dining chairs and bar stools
- Coffee tables and end tables
- Small bookcases and nightstands
- Floor lamps and small accent tables
- Lightweight ottomans and benches
Items painters typically will not move:
- Upright or grand pianos
- Full wall units and entertainment centers
- Heavy antiques and marble-topped furniture
- Beds with attached headboards or bed frames
- Mounted TVs and wall-bracket shelving
- Large refrigerators or appliances near painted walls
The dividing line is what the industry calls “reasonable to move.” A single crew member can safely shift a side table; a 400-pound armoire is a different matter entirely. Liability is the other factor. If a painter drops a fragile antique while repositioning it, the question of who pays for the damage gets complicated fast. Most contractors draw a clear line at items that require specialized equipment or more than two people to lift safely.
Working around furniture is possible, but it generally slows the project and increases the risk of an incomplete or lower-quality finish. Clearing the room, even partially, almost always produces better results.
Do painters charge extra to move furniture?
Sometimes it is included; sometimes it is not. The answer depends on the contractor and the scope of the job.
Factors that affect cost:
- Volume of furniture: Moving three chairs is different from clearing a fully furnished living room.
- Weight and fragility: Heavy or delicate pieces take more time and carry more liability.
- Disassembly and reassembly: Bed frames, modular shelving, and sectional sofas may need to be broken down before moving.
- Number of crew members required: A two-person job costs more in labor than one a single painter can handle.
- Floor protection time: Laying down drop cloths and securing plastic sheeting adds prep time, which some contractors bill separately.
Common pricing models:
- Included in the base estimate (most common for light furniture in a standard room)
- Per-room add-on fee for full furniture relocation
- Per-item charge for heavy or specialty pieces
- Separately quoted for large jobs or multi-room projects
Some contractors include light furniture moving in the base price while charging for heavy or multi-room moving; others quote it as a line item from the start. Neither approach is wrong, but you need to know which one you are dealing with before the crew shows up.
Questions to ask your contractor before signing:
- Is furniture moving included in this estimate, or is it an add-on?
- How do you price heavy or specialty items?
- Will you provide an itemized breakdown of any moving-related fees?
Pro Tip: Request a written, itemized estimate that lists furniture-moving scope and any per-item charges as separate line items. A verbal “we’ll take care of it” is not a contract.
How professional painters protect furniture and floors
Protection quality separates a clean job from one that ends with paint-speckled upholstery and scuffed hardwood. Professional crews use a layered approach, and the materials they choose matter.
Material comparison:
| Material | Key Advantage | Key Limitation | Best Use |
|---|---|---|---|
| Plastic sheeting | Waterproof, drapes over odd shapes | Slippery underfoot, tears easily | Covering furniture, wrapping upholstery |
| Canvas drop cloths | Absorbent, non-slip, durable | Not waterproof on its own | Floor coverage in trafficked areas |
| Rosin paper | Flat, floor-safe, good traction | Not absorbent for heavy drips | Hardwood and tile floor protection |
| Masking paper (kraft) | Strong, tear-resistant | Can leave residue on delicate surfaces | Protecting trim, counters, firm surfaces |
| Masking paper (washi/low-tack) | Gentle adhesion, no residue | Less protective on rough surfaces | Delicate finishes, antique furniture |
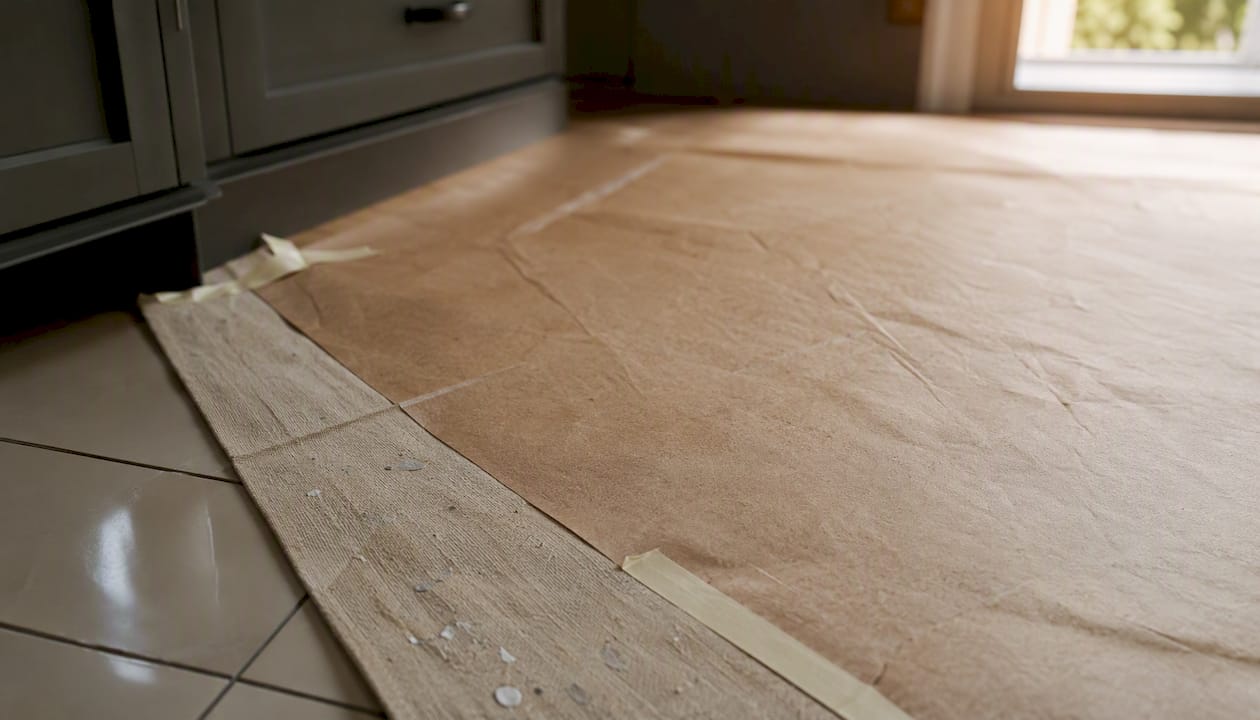
Plastic provides waterproof protection while canvas drop cloths provide absorbency and traction; professionals often layer plastic under canvas for waterproofing plus safety. Choosing the right masking paper by task matters too: heavy-duty kraft for strong protection, and lighter washi or crepe varieties for delicate surfaces to avoid residue or damage.
Standard protection steps a professional crew follows:
- Move furniture to the room’s center, leaving at least a 3-foot clearance around perimeter walls.
- Drape plastic sheeting over all covered pieces, pressing it into upholstery crevices.
- Secure edges and seams with painter’s tape to prevent roller mist from migrating underneath.
- Overlap plastic sheets by several inches at every seam.
- Lay rosin paper or canvas drop cloths on the floor, starting at the walls and working inward.
- Place canvas on top of plastic in any area where crew members will walk.
- Mask fixed items (baseboards, door frames, switch plates) with appropriate tape and paper.
Pro Tip: Never rely on plastic sheeting alone on a floor where painters will walk. Plastic over hardwood is a slip hazard. A layer of canvas or rosin paper on top solves both the traction and absorption problem at once.
What you should do before painters arrive
Your prep work directly affects how smoothly the job goes and whether you get charged for extra time. A well-prepared room lets the crew start painting faster and reduces the chance of damage to your belongings.
- Remove all small décor and valuables. Take down wall art, mirrors, and framed photos. Pack away figurines, vases, and anything on shelves or surfaces.
- Unplug and box electronics. Move small electronics out of the room. For larger items like TVs, confirm with your contractor whether they will handle dismounting or whether you need to arrange that separately.
- Empty furniture that will be relocated. Drawers and shelves add significant weight. Empty them before the crew arrives so items can be moved safely.
- Move fragile items out of the room entirely. Do not rely on drop cloths to protect a piece you cannot afford to damage. Antiques, heirlooms, and anything irreplaceable should leave the room before the crew arrives.
- Clear access paths. Make sure the crew can move freely from the entrance to every wall. A clear path reduces the risk of accidents during furniture relocation.
- Confirm what the contractor will handle. Review the scope of work the night before. If anything is unclear, call and confirm. This is also a good time to check your room layout and paint quantities so there are no surprises on the day.
Pro Tip: Photograph the room layout and take a quick inventory of valuables before the crew arrives. If something is damaged or misplaced, that documentation makes the conversation with your contractor much easier.
What to do with large, heavy, or delicate items
Pianos, built-in wall units, antique furniture, and mounted electronics sit outside what most painting crews will move. You have a few practical options.
- Hire professional movers for the day. Schedule them to clear the room before the painters arrive and return after the job is done. This is the cleanest solution for heavy or high-value pieces.
- Arrange a prep day. Some contractors offer a pre-paint prep visit where they assess what needs to move and coordinate logistics. Ask whether this is available when you get your estimate.
- Have painters work around the item. This is a viable option for truly immovable pieces. For immovable or very large items, contractors use static-cling masking film and layered barriers to fully encapsulate surfaces without moving them. The trade-off is that the area directly behind the piece may receive less thorough coverage.
- Hire antique handlers or specialty movers. For high-value antiques or grand pianos, a general moving crew is not the right call. Specialty handlers carry appropriate insurance and know how to move fragile pieces without damage.
Plan disassembly and reassembly of electronics and shelving before paint day. A mounted TV bracket left on the wall is a painting obstacle; removing it the day before takes ten minutes and saves the crew significant time.
When is it safe to move furniture back after painting?
Putting furniture back too soon is one of the most common ways homeowners damage a fresh paint job. Three terms matter here: surface dry, recoat window, and full cure.
- Surface dry: The paint feels dry to the touch, usually within 1–2 hours for latex/waterborne paints. Do not move furniture at this stage.
- Recoat window: The point at which a second coat can be applied, typically 2–4 hours for latex. Still not safe for furniture contact.
- Full cure: The paint has reached its maximum hardness. For most latex paints, this takes 2–4 weeks. Light contact is possible before full cure, but the surface remains vulnerable to scuffing and sticking.
Practical rules for furniture return:
- Wait at least 24 hours after the final coat before moving any furniture back into the room for most latex jobs.
- For oil-based or alkyd paints, wait 48–72 hours minimum before light contact; full cure can take several weeks.
- Always lift furniture rather than sliding it. Sliding drags across the surface and can scuff or peel paint that has not fully hardened.
- Place felt pads under furniture legs before setting pieces down on freshly painted baseboards or trim.
- Protect floors during the move-back with canvas or rosin paper, especially on hardwood. For guidance on caring for the surface afterward, see how to clean painted walls without damaging the finish.
Understanding the difference between paint types and their drying characteristics helps you set realistic timelines for when the room is truly ready.
Key questions to ask your painter about furniture and protection
Getting clear answers before work starts prevents misunderstandings and unexpected charges. Ask these questions directly and get the answers in writing.
- What exactly is included in the estimate? Confirm whether furniture moving, floor protection, and cleanup are line items or assumed to be included.
- Do you charge to move heavy or specialty items? If so, ask for a per-item or per-room rate in writing.
- Who is responsible if something is damaged? Ask whether the contractor carries general liability insurance and how damage claims are handled.
- What protective materials will you use? A professional crew should be able to name the materials they use for floors and furniture without hesitation.
- When will furniture be returned to its original position? Confirm whether the crew repositions items after painting or whether that is your responsibility.
- Will you provide a written scope of work? Any contractor worth hiring will put the full scope, including furniture handling, in the estimate.
A short conversation before the job starts is far easier than a dispute after it ends.
A deeper look at protection materials, layering, and taping
Understanding how professional protection actually works helps you evaluate whether a crew is doing the job properly.
Material pros, cons, and recommended uses:
| Material | Pros | Cons | Recommended Use |
|---|---|---|---|
| Plastic sheeting | Waterproof, flexible, inexpensive | Slippery, tears under foot traffic | Furniture covers, wall masking |
| Canvas drop cloths | Durable, absorbent, non-slip | Not waterproof alone | Floor coverage in work areas |
| Rosin paper | Flat, stable, good floor traction | Limited absorbency | Hardwood and tile floors |
| Kraft masking paper | Strong, tear-resistant | Can leave adhesive residue | Trim, countertops, firm surfaces |
| Washi/low-tack masking paper | No residue, gentle on finishes | Less protective on rough surfaces | Delicate furniture, antique finishes |
Step-by-step layering for floors and furniture:
- Lay plastic sheeting as the waterproof base layer on floors, running it to the wall edge.
- Tape seams where sheets overlap, pressing edges flat to prevent tripping hazards.
- Place canvas drop cloths or rosin paper on top of plastic in all areas where painters will walk.
- For upholstery, press plastic into crevices and secure with painter’s tape at every seam.
- Overlap all sheets by at least several inches; never butt edges together.
- Apply blue painter’s tape along baseboards and trim, pressing the edge firmly to prevent bleeding.
- Tuck plastic edges under furniture legs rather than leaving them loose.
Taping technique matters. Blue painter’s tape (3M ScotchBlue is a widely used standard) should be pressed firmly along its entire length with a putty knife or your fingernail. Loose tape allows paint to bleed underneath, which defeats the purpose. Remove tape while the paint is still slightly tacky, not after it has fully dried, to avoid pulling the finish.
Pro Tip: Aim for a 3-foot clearance between furniture and every wall. This gives painters room to cut in cleanly along the ceiling and baseboard without awkward angles that cause drips and uneven edges.
What most homeowners get wrong about furniture and painting prep
The most common oversight is not emptying furniture before the crew arrives. A dresser with full drawers weighs two to three times what an empty one does. Painters who agree to move furniture are agreeing to move it at a reasonable weight. Showing up to a room full of loaded bookshelves and packed wardrobes is a different job than what was quoted, and it often results in either extra charges or items left in place.
The second mistake is skipping the written confirmation. Homeowners assume that because a contractor said “we handle everything,” the scope is clear. It rarely is. What counts as “everything” varies by crew, by region, and by how the estimate was written. The single most effective thing you can do before a painting project is confirm the furniture-moving scope in writing, including which items are included, which are excluded, and what happens if something is damaged.
Full-service painting that handles furniture protection for you
If coordinating furniture moving, sourcing drop cloths, and managing a crew sounds like more work than you signed up for, there is a simpler path.

5starpainting offers all-inclusive residential painting packages for HDB flats, condos, and landed properties in Singapore, with furniture protection built into the standard price. No separate quote for drop cloths. No surprise charge for moving chairs. Every job includes a dedicated project manager who coordinates prep, protection, and cleanup so you are not left managing the logistics yourself. The pricing covers genuine Nippon Paint, surface preparation, furniture protection, and post-job cleanup, with a one-year warranty on the finished work.
If you are preparing an HDB flat or condo for resale or a fresh start, get a quote for your property and see exactly what is included before committing to anything.
Sources
The following sources informed the protection materials, prep guidance, and contractor practices covered in this article.
- Protect Floors and Furniture When Painting
- How To Use Painter’s Plastic To Protect Floors And Furniture
- Can you paint a room with furniture in it?
- How Do You Protect Furniture and Floors During Interior Painting? – Randall’s
2 Responses